More Green For Less Green

Living more eco-friendly for less money

9.09.2013

Using Thawed Eggs: Scrambled Eggs & Egg Hash

Awhile back, I wrote about how we got a great deal on farm fresh eggs and decided to freeze some for later. Well, we finally made it through the remaining fresh eggs on-hand and needed to dip into our freezer stash.

The first thing we noticed about the freezer eggs is that they defrost looking different than a fresh-cracked egg--the yolk is firmer and drier. The first time we defrosted some, we did it in a in an open bowl in the fridge overnight. We awoke to still-frozen eggs. We let them be for a few more days, by which point they were rather dry. They were usable, but not appealing. The second time, we used a non-air-tight container and let the eggs sit in the fridge for a couple of days. The were more moist this time, but still a bit off. The third time, we used an air-tight Pyrex bowl and transferred the eggs to the refrigerator mid-day. Ding, ding, ding! They ended up looking different than a fresh egg, but not unappealing.

Defrosted
I decided to scramble these, which seemed like a good choice for the texture. The whites cooked up like a fresh egg. The yolks held together, unlike the wiggly, breakable quality of a fresh yolk.


Whites are cooking nicely, yolks remain firm
I pressed down gently with a spoon to break the yolks up. It didn't ooze like a fresh yolk; it did something drier than a squish but moister than a crumble. The difference didn't matter through, as the yolk bits scrambled in with the white bits, the whole thing cooked up just like the fresh-gg scrambled eggs I'm familiar with. It was delicious!


Scrambled eggs, just like normal
We just started a dairy-free, gluten-free, berry-free trial at our house to help with various issues, namely V's eczema, and having the eggs on hand helped us kick off our first GF/DF breakfast wonderfully. We made a potato, egg, spinach, sausage hash with ten defrosted eggs (our recipe was inspired by this one).
Egg Hash
 
It was yummy, used up some of the massive amounts of potatoes we recently dug up at our community supported agriculture (CSA) farm, and made enough that we can reheat it for mornings later this week.

Digging for potatoes

Later this week, we'll give defrosted eggs a try again when we make Mini Egg Pizzas. We are curious to see how they do when baked.


Labels: , ,

7.03.2013

Brewing Kombucha: Step-by-Step


Now that you've gathered all of the supplies to make kombucha, now it's time to brew!

(If you are wondering what kombucha is, start here.)


Day 1: Brew

Today, you will need
  • 1 gallon water
  • 3-4 bags or 2-4 tablespoons loose leaf tea
  • 1 cup sugar            
  • 1 symbiotic colony of bacteria and yeast (SCOBY) and fermented liquid   
  • Pot
  • Spoon
  • Large glass brewing jar (mine is an old pickle jar)
  • Sieve (if using loose leaf tea)
  • Piece of cloth large enough to cover the jar opening
  • Rubber band or twine(Additional details about these items are here.)

  1. Boil water in the pot.
  2. Remove from heat and stir in tea leaves and sugar.

  3. Let the sweet tea cool to room temperature. (I go about my day and then come back to it when I have time.)
  4. Pour the room-temperature sweet tea into the glass container/fermenting jar
    • Strain while pouring if using loose-leaf tea.
    • If your SCOBY came in fermented liquid, be sure to add this to the jar. Alternatively, you could add a bit of store-bought kombucha. If you do not have any already-fermented liquid, plan for your first batch to take a minimum of ten days rather than seven. If you are maintaining a SCOBY hotel, refresh your backup jar with any remaining tea.


  5. Cover the jar with cloth and secure with rubber band or twine.

  6. Leave in an out-of-the-way, warm place out of direct sunlight (indirect light is fine).
Day 6+: Prepare to Bottle
  1. Clean the Day 7+ bottling and brewing equipment (see preparation instructions).
Day 7-10+: Bottle and Brew

Today, you will need

  • 3-5 glass bottles
  • Something to label storage bottles with 
  • Funnel
  • Sieve
  • Flavoring agents
  • All Day 1 supplies, if starting another batch
    (Additional details about these items are here.)
  1. One to two-ish weeks after you've brewed, it is time to bottle. The longer you wait, the less sugar will remain and the benefits of fermentation will be stronger. However, the taste will be more vinegary. Each family will have their opinion on when the brew is ready. We like 7-10 days. We did three weeks once, and it was not palatable.
  2. Inspect your SCOBY and the brew. Mold is bad. Colors in the realm of cream and brown are normal variations for a SCOBY. Bubbles also are normal, but not required.
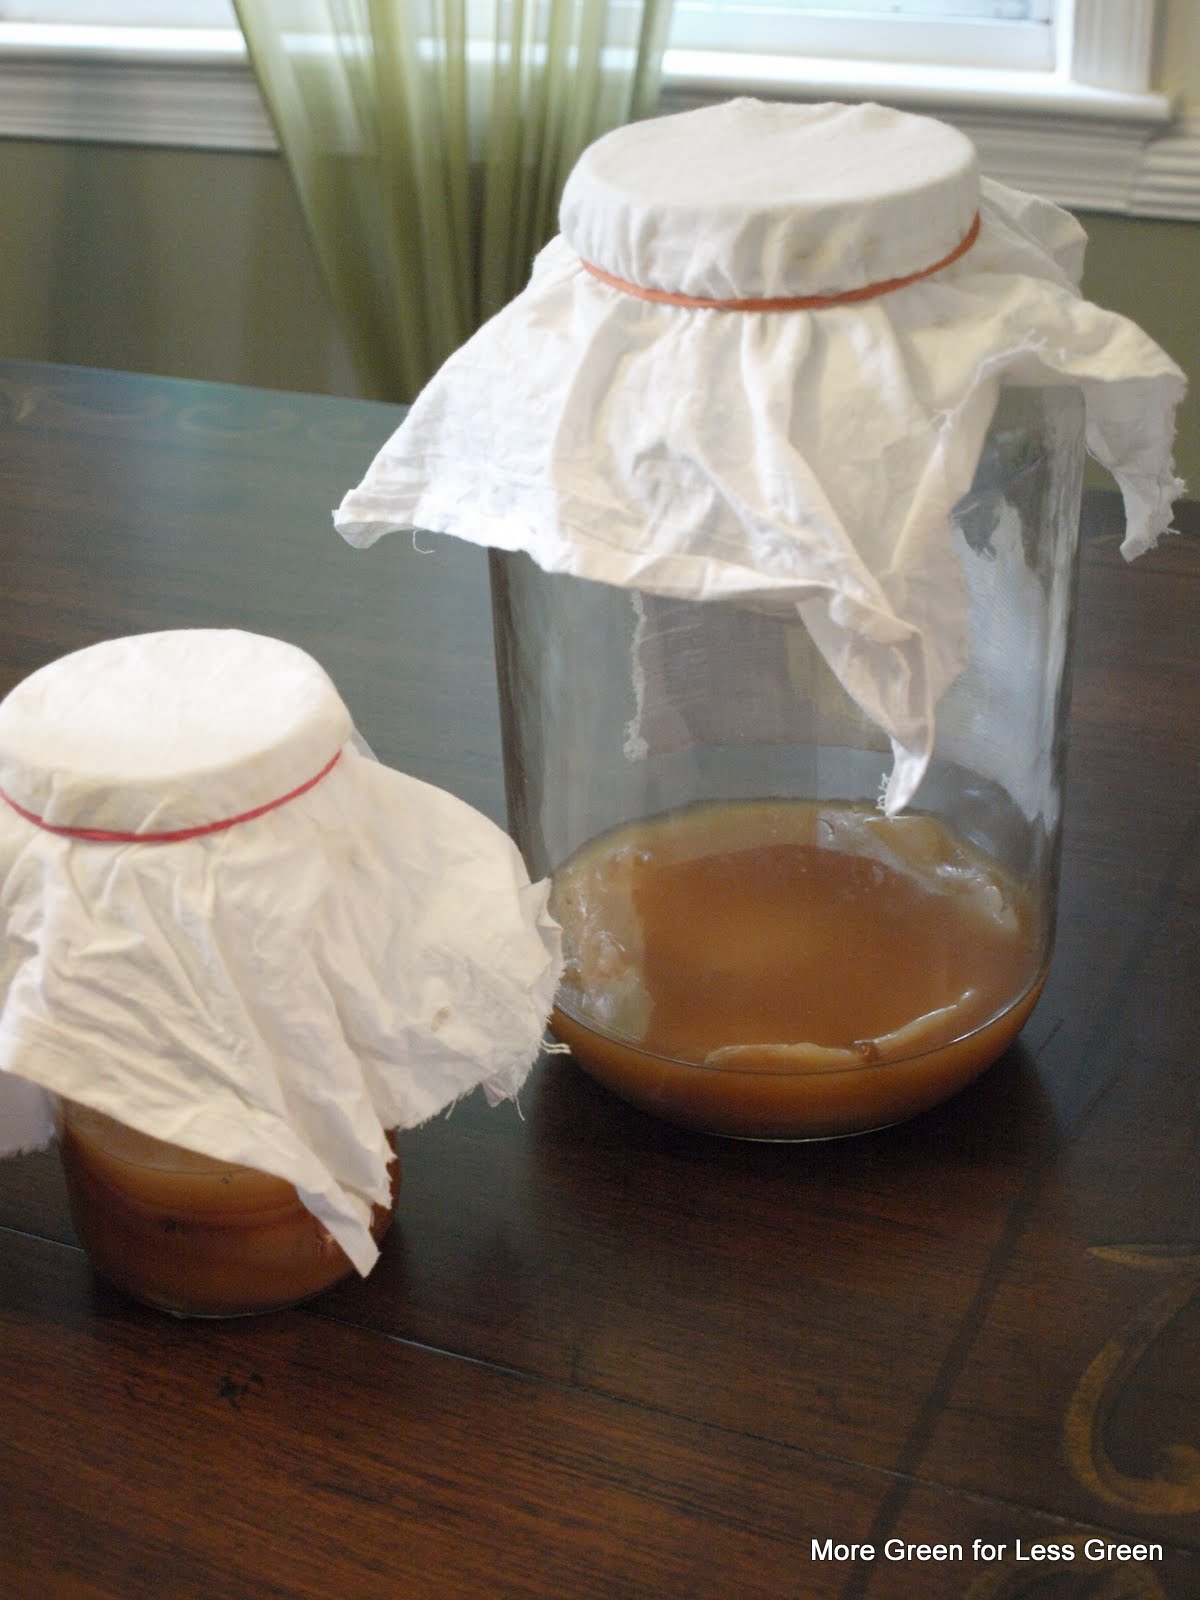
    The bottom picture shows the various colors and textures that a healthy SCOBY can have. You do no need to remove the SCOBY from the jar (though you can, if you'd like to rinse off the stringy and chunky bits)
  3. If you are doing the continuous brew method,  boil water and add tea and sugar. Let sit in the pot to cool. (See Day 1 for a review, if needed)
  4. In the meanwhile, bottle last week’s batch. The dishwasher door is a great place to do this and contain any spills.

    E is not amused at being left out.

  5. Pour the kombucha into glass bottles using a funnel and sieve (to strain out debris).

  6. If you would like carbonation, leave a good amount of head room.
    The red is the kombucha. You can see  I've left several inches of headroom on this narrow-necked bottle. I'd leave less with a wide-necked jar.
  7. Leave some of the brew in the fermenting jar for the next batch (or to feed your SCOBY if you are not brewing again right away).
    The SCOBY remains covered with old kombucha in preparation for a new batch.

  8. You can drink your kombucha now, or you can flavor it and then do secondary fermentation. Flavor the drink by adding pieces of fruit, herbs, or juice into the bottles. A post just on this is forthcoming, but I'll share that my favorite is freshly squeezed orange juice plus the rind.
    Yummy organic oranges.

    Cranberry, mango, and plain

  9. Label the bottles with the date and flavors.
    A grease pencil works well for labeling.
  10. Let the filled bottles sit at room temperature for a few days to carbonate and undergo secondary fermentation (if desired).

    The top of the refrigerator is a good storage space in our small kitchen.
  11. If you are doing the continuous brew method, start your next batch by adding the cooled sweet tea from step 2 into the fermenting jar (along with the reserved fermented kombucha).
3 Days Later
  1. Put the bottles in the fridge to end fermentation (so it doesn't become alcoholic).
  2. Drink as desired. (Take it slow if you are new to kombucha. The benefits to your gut health can be a little too good if you start with too much, too soon.)

    Berry Kombucha

Labels: , , ,

6.27.2013

Preparing to Brew Kombucha

This is part of a series on brewing kombucha. You can view all of the kombucha entries here.
 
It takes some time get all of the items needed to brew kombucha. But, this part is probably the hardest step, as the brewing is easy. Here is how to prepare:

Gather Ingredients

Water- 1 gallon
I estimate by using a large pot. Precise quantity is not important. If using tap water, you do not  need to prepare this ahead of time.

Tea (black tea works well) - 3-4 bags/2-4 tablespoons loose leaf
Quantity varies based on quality and type of tea. I have had success with Wegman’s decaf orange pekoe (bags), and Frontier’s Organic Black Decaf (loose). Herbal tea and chai turned out vile.
Sugar  - 1 cup          
I mostly raw cane sugar because that is what we have, but the cheap white stuff works just as well. You can use honey or other natural sweeteners, but it can produce an off taste. Note that the sugar feeds the SCOBY, and little sugar will remain in the fermented product (the longer is brews, the less sugar remains). 
Symbiotic colony of bacteria and yeast (SCOBY)                     
Reserve the liquid the SCOBY comes in. Obtain from a friend, online, or even Craigslist.


Gather supplies

Needed for Day 1
  • Pot
  • Spoon
  • Large glass brewing jar (mine is an old pickle jar)
  • Sieve (if using loose leaf tea)
  • Piece of cloth large enough to cover the jar opening
  • Rubber band or twine
  • Optional: small glass jar, extra fabric, extra twine (for backup SCOBY)
 
Some of the Day 1 Supplies
 
Needed for Day 7+
  • 3-5 Storage/drinking bottles, glass (Old glass jars with lids work just as well as beer brewing bottles. If using jars with metal lids, place a piece of parchment paper in between the jar and lid.)
  • Something to label storage bottles with (grease pencil, masking tape, post-it, Sharpie, etc.)
  • Funnel
  • Flavoring agents (fruit, juice, herbs, etc.)
Some of the Day 7+ Bottling Day Supplies
 
Clean Your Equipment
  • Using a dishwasher on heat dry is an easy way to sanitize (even if you don’t have a sanitize cycle).  
  • Alternatively, boil water and then submerge small items in the water (provided they are heat-safe). For your brewing vessel, pour some of the water inside, cap, and swish around, being mindful that the glass will get very hot. Dump out the water.
  • Let all items cool to room temperature before using.

Prepare a SCOBY hotel (optional)
Sometimes SCOBYs go bad. Other times, you might make a really vile batch of kombucha and you want to have clean starter liquid on reserve for your next batch rather than perpetuating the nastiness. To make a SCOBY hotel, assemble a jar containing a small bit of SCOBY (perhaps one layer of your large SCOBY) and a small amount of kombucha. Top with cloth and rubber band or twine. Leave in an out-of-the-way, warm place out of direct sunlight (indirect light is fine).
 

Preparing the SCOBY Hotel and Fermenting Jar

 Coming soon...brewing instructions.

Labels: , , ,

5.21.2013

Freezing Whole Eggs

We switched to buying local, pastured meat via monthly pick-up earlier this year. While we are very happy with this choice ethically, we are still navigating keeping costs down. One way we do so is by taking advantage of sales. Each month, the farm runs a different seasonal special. This month's special was discounted eggs, but only with a minimum order of six dozen.  Our refrigerator is only so big, but with the power of a chest freezer, we decided to go ahead and place the order knowing that we could freeze the eggs.

OK, it was only theoretical knowledge. I'd heard that it could be done, but not tried it myself. What I discovered is that it was quite easy, once I figured out our setup.

I decided to wrangle one dozen at a time. I cracked a single egg into each silicone muffin liner. 
(I used the edge of a bowl to get a good crack, the silicone is too squishy.)Once all dozen were cracked, I covered the eggs with wrap and then laid it flat in the chest freezer. (I'd previously prepared a flat spot for the tray.)


After a few hours, the eggs were frozen.


It was easy to flip the silicone liner inside out and pop the egg pucks out into a container. At first, I put the egg pucks in Pyrex, but there a lot of wasted space in each container.  (More on that in a moment.)

Rather than cleaning the liners, I started with the next dozen and got everything back into the freezer quickly. V was eager to help, so I put him in charge of putting the empty shells into a compost bowl. he liked getting "juicy" from the tendrils of egg white. Ah, two-year-olds. I love it!

Anyway, back to the storage issue. I decided to move the egg pucks into a plastic bag. We rarely use bags, but sometimes they really do fit the bill. Ultimately, I got three dozen eggs into a one gallon bag.


Next up, we need to decide how we'll use them and see how easily they defrost.


Labels: , ,

5.03.2013

Kombucha Homebrewing Kick Off


I was at a Holistic  Moms Network (HMN) when I first drank kombucha. I had no idea what kombucha was, but the bottle said it was ginger and lemon flavored, so I gave it a try. Surprising! Zingy! Yum! It had some effervescence to it and a light sweetness but also a slight vinegar taste (a good thing in my book).  Then I found out what kombucha is: fermented tea.
 
On the one hand, that freaked me out. It makes it sound like I am going to get food poisoning. On the other hand, fermented foods (e.g. kimchi) and drinks (e.g. wine) have long been a healthy part of many traditional diets. I actually had been looking to add fermented foods to my diet to help with acid reflux and it seemed that kombucha could fit the bill in a delicious way.
I bought a couple of bottles at the store but at nearly $4 a pop, that could only be a special treat. Inspired by some fellow HMN members, I decide to try brewing my own. I got a one-gallon glass pickle jar off Freecycle to be my brewing vessel. A new friend from the group gave me a SCOBY (the living part of the kombucha) along with a crash course. 
SCOBY is short for symbiotic colony of bacteria and yeast. The SCOBY digests the sugar from the sweetened starter tea and turns it into the fermented kombucha. The SCOBY looks really slimy, flimsy and disgusting in pictures. I find it less gross in person. It looks wet, but is fairly dry to the touch and it sturdier than I expected it to be.

 Armed with tea, SCOBY, bottles, and some courage—I gave it a go and am now on my fourth batch. I am shocked at how easy brewing it is. I spend just 20 minutes per week of active time with the brewing, flavoring, and bottling. That said, I just ended up with my first truly yummy bottle today. Needless to say, I need to work out some more of my kinks before I do a full tutorial.
 
 In the meanwhile you can learn from some of my early mistakes...
·       Starting off with a good non-herbal tea really is key. Believe the internet on this: herbal tea can lead to funky kombucha. Getting so excited about brewing kombucha that you grab the remainders of a box of a coconut chai, red tea/herbal tea blend and just go for it gives instant satisfaction. But you pay for it when the kombucha is ready 10 days later and tastes utterly vile. In this case, water your compost pile with it or offer it to a non-discerning two-year-old who will (shockingly) ask for more.

·       In the case of bad starter tea, do not retain 1/3 gallon of the vile kombucha to help ferment the next batch with a superior tea, as it will make the next batch taste gross, too.

·       Do not freak and think your SCOBY has gone moldy when really all you are seeing is the new baby SCOBY growing on top.
Healthy Baby SCOBY

Labels: , , ,

2.24.2010

Improved Homemade Dishwasher Detergent

I posted quite awhile ago about my homemade dish detergent (and why we use it over conventional) and how we were using it in spite of cloudiness. Reader Special765 suggested adding citric acid to the mix to help. That did the trick! It took us some time to get the amounts just right for our water conditions, but I feel like we finally have it perfected. Here is the new and improved recipe:

One Batch of More Green for Less Green Dishwasher Detergent
(Yields about 70 loads)

Dry ingredients:

  • 3 cups baking soda
  • 1 cup borax
  • ¼ cup citric acid*

Wet ingredients:

  • Essential oil (optional)
  • Vinegar

Mix dry ingredients in a container and shake to mix. Keep wet ingredients on-hand for each load of dishes.

Shake dry mix before each use and then open container pointing away from your face. Moisture causes clumping and activates the citric acid so make sure your container is air-tight. We got a container similar to this at a yard sale for $1. For extra protection, consider adding a dried out brown sugar bear (or the like) to absorb any moisture. I suspect any piece of terracotta will do.

For each load, pour the detergent to the lowest line on the dispenser cup (for us this is 1 tablespoon). Most people use too much detergent and go to the top of the cup, but more is not necessarily better— and is probably not what your machine's user manual suggests. If 1 tablespoon is also the right amount for your machine, one batch of this detergent will last for 70 loads.

I add 2 drops of essential oil per load on top of the dry mix. Generally I use tea tree oil, which has natural antiseptic properties, but if I'll be in the kitchen I'll put in a smell I really love like bergamot or sweet orange since the scent will be released in the steam that comes out of the machine.

I've stopped using the rinse-aid compartment for vinegar. Instead, I put a healthy squirt of vinegar in the bottom of the dishwasher (between 1/8 and 1/4 cup). I use an old, plastic sports bottle with squeeze top for this. It is so handy to just grab and squirt! Adding more vinegar than the rinse aid dispenses seems to do the job better. My bottle is similar to this. Used ones are abundant and dirt cheap or free, so no need to buy new plastic!

This mixture is just right for the water in my area, but you may need to play with the ratios for water conditions in your area.

*To find citric acid locally check at an Indian grocer (probably the best chance for a good price, since they will likely sell by the bag and not in a pricey brand-name bottle). Also try specialty supply shops that sell things for making cakes, candy, soap, or cheese; or try a health food stores (e.g.Healthway, but it is pricey there). You also can buy it online.

Labels: , , ,

10.26.2009

“Sun-Dried” Tomatoes

I love free—not only free stuff but also free food. This summer, friends shared fresh grown herbs, blackberries, and cherry tomatoes with me. The herbs turned into wheat herb bread plus dried herbs to use later on. The berries were shared with our Bible study small group and gobbled up, and the tomatoes were dried and turned into mock "sun-dried" tomatoes—more accurately just called dehydrated tomatoes in my case. We bought the dehydrator for $5 at a church rummage sale several years ago, and have more than gotten our money out of it.


Cutting and placing the tomatoes.
I forgot to take a picture of the end product.


To dry the tomatoes, I removed the stems and washed them, and then I cut them into ¼ inch-ish slices. I decided to leave the skins on. The tomatoes were so small to begin with thta skinning them seemed like it would be a hassle and make my yield even smaller. I sprinkled half of the slices with the dried herbs (from aforementioned friend) and the other half I left plain. Then I turned on the dehydrator and let it run, and run, and run, and run. It took a long time. I didn't want the tomatoes to over-dry, so when we would be out of the house for hours we would turn off the dehydrator until we were home again to babysit them. I pulled the slices off individually as they got to the right texture—no more juiciness, but not crunchy, either. I used this recipe as my inspiration.

I packed half of the tomatoes in olive oil and put them in fridge. The other half I left without oil and popped them in the freezer to use later on. You could leave them at room temperature, but they will go rancid fairly quickly. To me, storing them at room temperature is not worth the risk of bacteria growing. The ones from the freezer (not in oil) are great for plucking out one at a time because they defrost at room temperature within minutes. So far, I have used them in stuffed chicken and as a salad topping and they are so yummy!

This is a great way to preserve tomatoes from the garden that will go bad before you can use them or to make sure you have seasonal, local tomatoes into the off-season. As for price, commercially sundried tomatoes are pricey! Homegrown dried tomatoes are infinitely cheaper than paying for them plus you eliminate the packaging and shipping environmental costs. I am so excited to grow tomatoes at the new house! I am not a raw tomato fan, but I look forward to making sauces and dried tomatoes.

Don't have a dehydrator? Here is info on literally sun-drying tomatoes plus a link to an oven-drying recipe. Obviously I disagree that only plum tomatoes should be used. I say, give it a try with whatever tomatoes you've got!

Labels: , ,

1.12.2009

9 Changes for 2009- #4 Dish Detergent

This entry is part of a series on changes I made in 2008 that I want to stick with in 2009…


  1. Cut out commercial breakfast bars
  2. Cut out canned beans
  3. Use only environmentally friendly dish detergent
    (homemade to boot)

    Why…

    So question one is why an environmentally friendly detergent even matters, right? Most conventional dishwasher detergents contain phosphates and chlorine. Phosphates seriously impact our water supply by encouraging excessive algae growth which kills fish and plant life. Chlorine bleach is an environmental pollutant and it may cause immune and reproductive system problems. Now, I am not alarmist about many things, so the possible concern about bleach doesn't faze me too much. But, the dangerous chemical reaction caused by bleach mixing with ammonia that we've all been warned about since we were kids is undoubtedly of concern. Ammonia is a more eco-friendly choice, so I'd just as soon stick with that one and keep out the bleach.

    Here's what we did…

    We made our own. We started off by using a recipe from Green Clean of 1 part borax to 1 part washing soda. We put 1 heaping teaspoon of the mix in the release cup and vinegar in the rinse aid. We started off using 2 tablespoons of the dry mix, but that made the dishes cloudy, so we cut down until we got the right amount for our water. But, we were having issues with cloudiness and chunks of food remaining. So onto blend two…

    Our second attempt was 3 parts baking soda to 1 part borax along with the vinegar in the rinse aid compartment. With this mix you use just as much as you would with a conventional powdered detergent. I read the instructions for the dishwasher to refresh my memory, and it turns out that we've long been putting in too much: the lowest line on the cup is ample for normal loads. We also add 2 drops of essential oil per load on top of the dry mix. Generally I use tea tree oil, which has natural anti-bacterial properties, but if I'll be in the kitchen I'll put in a smell I really love, like bergamot or sweet orange, since the scent will be released in the steam that comes out of the machine.

    We've stuck with this second blend for many months now. I use an old 32 oz yogurt container to mix the powder (measure and dump in, put lid on, then shake to mix). I only need to make up a new batch every other month or so.

    I will be perfectly honest and say that we are still dealing with cloudiness. We've taken to wiping the dishes with a slightly damp cloth as we put them in the cabinet to fix this problem, but I know that cloudiness simply is unacceptable to some people. Some days it bothers me and I consider trying out Ecover or another similar green product, but most days I love that it is so much cheaper than anything else. My price per year is about the cost of a single box of brand name commercial dishwasher detergent. Even if we go to a commercial product, I am committed to staying away from dish detergents with phosphates or chlorine bleach.

    UPDATE: See my improved (dare I say, perfected) recipe here.


Labels: , , ,

1.11.2009

9 Changes for 2009- #3 Hummus

This entry is part of a series on changes I made in 2008 that I want to stick with in 2009…

  1. Cut out commercial breakfast bars
  2. Ditch premade hummus (and all those containers)
    by making it at home.

    Okay, this one totally piggybacks on the bean post. Let me confess right now that a love of hummus is where the whole bean soaking in mass quantities idea stemmed from.

    There are many reasons to love hummus: it tastes great, is nutritious, and jazzes up veggies or pita to make light but filling snack or meal. But, all of those little plastic containers they come in add up. My county only recycles plastic containers with necks, so we either could keep amassing them (but there is so much space, right?) or throw them away (eek, never!). So, we decided to start making our own.

    We tried some actual recipes (there are tons online) and devised many of our own: basic, lemon, chipotle, roasted pine nut, roasted garlic, roasted eggplant, mixed hot pepper, and roasted sweet red pepper. I also just learned about pumpkin hummus—we'll have to try that, since we are still wading in pumpkin.


    As you may guess from the bean post, since dried beans are so cheap, homemade hummus is considerably cheaper than packaged hummus. Another score for reducing packaging, saving money, and increasing yumminess!

Labels: , ,

11.09.2008

Homemade Laundry Soap


Left Image: Left jug is recently shaken and mixed.
Right jug is unshaken and has settled into soapy layer and watery layer
Right Image: When mixed right before use, the laundry soap is creamy and slightly bubbly


After trying several batches of dry laundry soap, my husband asked me to make a liquid one. The liquid/gel I made is #1 from this great website, Tip Nut. We are very happy with the way the soap works. We now use it for all of our laundry and have successfully used it at all wash temperatures. The three dry recipes we tried were Tip Nut #4, Tip Nut #9, and a mix of half borax and half washing soda. While the dry ones all seemed to work equally well, my husband prefers liquids laundry soap/detergent. Since he does the laundry, I am happy to whip up whatever works best for him!

In my pictures you can see that I have the laundry soap in milk jugs. I do not recommend this unless you have hosing available to siphon the cooked soap from the pot through the slim necks of the jugs. Since my husband homebrews, we did have a suitable plastic tube, but this ended up being messy, frustrating, and time consuming as the liquid congealed into a gel. Stick with a bucket! The soap will separate and requires stirring or shaking before use to remix the water (which will settle) and the soap gel (which will float). In the picture on the left, the left jug is recently shaken and mixed, the right jug shows the settling and separation.

n.b., Homebrewing husbands may not be thrilled with such use of said tubing since soap makes beer go flat. Eeek!


-------

Why in the world I would make my only laundry soap? For us, there are four answers to this:

Environment – Environmentally, making my own laundry soap is a good choice because it doesn’t require an endless cycle of new packaging production, shipping, and disposal/recycling. Also, most commercial liquid detergents have petrochemicals in them. Not only are petrochemicals bad for the water supply, but they use petroleum which is a non-renewable resource and is so very politically charged right now. Here is a link on Dr. Bronner’s Soap (eco-friendly, organic, and fair trade) which is the soap I use in my cleansers and laundry soap: here.
This site lists many names for petrochemicals that you might see in the ingredients list of your soap/detergent (should the manufacturer actually disclose what is in their product).

Health – My husband has contact dermatitis so artificial fragrances are bad for his skin. The artificial colors, scents, and additives in most commercial detergents are of concerns to many people. Personally, this is an area that I approach with caution, but am not alarmist over. Look up your favorite detergent here so you can make a decision about what is best for your home.

Cost – Making laundry soap is dirt cheap. Though I personally have not calculated the cost, others who use similar recipes cite $0.03 per load. For me, the low cost is just an added bonus to the more important reasons above.

Fun – For me, stuff like this is an enjoyable hobby that yields a usable result just like cooking, homebrewing beer, etc. I find it fun and I like the whole “science in action” aspect.

Labels: , , ,

10.27.2008

Homemade Pumpkin Puree & Toasted Seeds

I imagine this sounds like a wacky undertaking to some. There is no doubt that canned pumpkin is easier and probably more consistent in quality, but hubby and I are working to cut down using canned products. One concern is BPA, but moreover, cans are heavy and require more energy in shipping, plus the production of the can and then recycling of it also use energy. In contrast, our local pumpkin had a quick ride from farm to farmer's market to our home and everything that we won't eat (pumpkin skin, stem, and guts) was composted.

Also, we love to do things on the cheap. And this was cheap, for sure. Our $5 pumpkin gave us the 13 cups of puree, plus lots of pumpkin seeds that I toasted for snacks.


Here are the instructions that I used for roasting the pumpkin:
http://www.ehow.com/how_8305_make-pumpkin-puree.html


Modifications: I did not use a pie pumpkin; I used a large jack-o-lantern one. Some people swear by not using those because they are less sweet and more stringy, but that is what they had at the farmers' market and several friends told me they had had success with them. Happily, my pumpkin wasn't stringy at all.


I cut the pumpkin in half with an electric knife. To scrape the inside, we have this little, cheapy pumpkin scraper from an old carving kit that works wonderfully. That part was less trouble than I anticpated. The longest part was getting the cooked pumpkin into the food processor. It wasn't hard as much as time-consuming. I felt like I was wasting too much by spooning it, so I used a filet knife to take off the skin.

While the pumpkin was roasting on the lower rack, I baked the pumpkin seeds on the top rack according to this recipe (which calls for the same temperature as the roasting pumpkin):
http://www.ehow.com/how_2091075_bake-pumpkin-seeds.html

But, if you'd like a little more variety with your seeds, I like all of the alternatives in this recipe:
http://www.ehow.com/how_2247741_season-pumpkin-seeds.html

If you haven't had pumpkin seeds before, they taste similar to a sunflower seed but have a very light pumpkin flavor to them. You can shell them and just eat the flat seed inside or eat them with the shell. Personally, I prefer to eat them in the shell because it is easier.

So what to do with 13 cups of pumpkin puree? I've been taking suggestions and here's what I've got: pancakes from the Deceptively Delicious cookbook, pumpkin chocolate chip cookies, my stepmom's family recipe pumpkin bread, pumpkin cupcakes with cream cheese frosting, pumpkin soufflé, Rachel Ray's gingerbread waffles, slow cooker pumpkin custard, pumpkin soup, and of course, pumpkin pie

Cost: $5 for the pumpkin
Time spent: 3 hours: 90 minutes of roasting, 90 minutes of labor: gutting the pumpkin, removing seeds for toasting, then shelling the cooked pumpkin, pureeing, and portioning*

*I portioned the pumpkin into a variety of sizes: ½ cup, 1 cup, 2 cups, and 3 cups and popped it into the freezer.

Labels: , ,

7.18.2008

Paper Towel Alternative


Eight months ago we decided to phase out paper towels in our house and switch to one-use-and-wash cloth towels. To maximize the eco-friendliness of this move, we wanted to repurpose something that we already had rather than go and buy a new cloths from the store. Enter my husband's old, holey T-shirts.

I started by cutting down each side seam, then cutting out the sleeves. With the shirt in more manageable chunks I was able to start cutting it into useable pieces. I decided that I wanted each cloth to be the size of 1/2 paper towel. This size is big enough for most clean-up jobs, but small enough that we aren't tempted to reuse them (and thus spread harbored bacteria).

Storing the cloths in discreet way was important to me. I didn't think a big wad of rags, even clean ones with a noble purpose, would encourage my husband to stick with it. So, I decided to use a small canister. While it is easy enough to just lob the cloths in there, I like a more streamlined approach. I stack all of the cloths, then invert the pile and push it in the canister so that just one cloth is visible (like how a box of tissues is packaged). That way I can grab one cloth without taking seven others out.

Once a cloth is used, it goes in an open plastic basket in the laundry room. Note that the holding area must be an open container (and be sure your wet cloth isn't balled up when it goes in) otherwise you will end up with a seriously stagnant stench. Blech!

In our house, white cloths are for kitchen jobs and they can get washed with any towel load. Any cloth made of colored or patterned cloth is for outside or bathroom cleaning. They have their own separate basket in the laundry room and get washed by themselves. (If you use cloth diapers or pads you could add these to that load). Honestly, I don't know if laundry cross-contamination is a legitimate concern or not, but I'd rather not risk it.

Labels: , , ,

6.24.2008

Cheap Meals On The Web

One of the best ways to stretch your grocery dollar is by letting nothing go to waste and really eating through your pantry. Finding a way to get rid of that container of plain yogurt you bought by mistake and all of those garden tomatoes is only a click away…

http://supercook.com/
Enter the ingredients you have on hand and it will list what you can make.

http://recipefinder.nal.usda.gov/
This United States Department of Agriculture (USDA) site not only lets you search by ingredient but also by cost per serving, cost per dish, nutritional content, audience, and cooking equipment.

http://allrecipes.com/Search/Ingredients.aspx
Another site where you can enter the ingredients you have on hand and it will list what you can make.

All Recipes also offers searching a section on budget cooking:

http://allrecipes.com/HowTo/Cooking-on-a-Budget/Detail.aspx

Labels: , , ,

6.19.2008

Saving With Green Cleaning and Beauty

For beauty and cleaning supplies, if you simply replace traditional commercial products with commercial eco-friendly products it really will hit you hard. You have to go into the green with a mentality of consuming and buying less.

One-for-one product replacement misses the point of going green since even the eco-friendly commercial products still come in plastic bottles, require shipping, and generate waste (or need to be recycled which uses energy).

Here are some ideas that might be worth trying: Can you use olive oil instead of lotion? Can you shampoo half as much as you do now? Can you make your own cleaning supplies for cheaper (with the added bonus of less packaging)? Can you buy castile soap in bulk and then use it for many things (from cleaning your home to cleaning your face)? Can you use baking soda instead of deodorant (just rub a generous pinch into each pit)?

Now, let’s move onto green cleaning specifically. I suggest reading the books Green Clean and Organic Housekeeping if you are serious about this kind of cleaning. OH talks about the science of cleaning and how it works (which makes you feel that you really can clean organically, if you are doing the right things) and gives some recipes. GC gives lots of recipes and is more anecdotal in tone.

Here are some common ingredients and where I found them (in Northern Virginia).

Washing Soda
If your grocery store doesn't have washing soda then request it! Barring that, you can get washing soda at Amazon or look for "PH Up" at a pool supply store. Get it for hot tubs and not pools as the pool kind tends to have other things added. Another place to look is an aquarium store since fish tanks need to have their PH changed. You want it to say 100% sodium carbonate on the label. It is also known as soda ash. It will be quite pricey at a pool store, though. I paid $8 for 1 pound at a pool store before I found it at a grocery store where it was $3 for 4 pounds.

Borax
I found borax at Wal-Mart in the laundry aisle. The brand I've seen at several places is called 20 Mule Team. It is also available on Amazon.

Fels Naphtha Soap
I haven't been able to find Fels Naptha Soap locally. Amazon sells it by the bar or in a package of thirty bars.

Instead, I decided to go with Dr. Bronner’s which they sell at Whole Foods. This will make a much milder product than the Fels Naphtha would. I currently am using the unscented/baby variety.

Most dry recipes call for grated soap, so I used our food processor to grate it into a chunky powder which I store in a jar.

Baking Soda
Baking soda in normal quantities can be found at any grocery store. I think I got my 4 lb box of baking soda at Wal-Mart in the laundry aisle. At work they have a twelve pound resalable bag of baking soda (probably from Costco), which I covet.

Vinegar
White vinegar can be found at any grocery store. The longer your jug lasts you, the longer between consuming plastic bottles, so the bigger the better!

Storage Jars & Spray Bottles
All of our dry cleaning mixes are stored reused jars. Containers that cannot be recycled are particularly good for this since otherwise they would just go in the trash. (We have a few #7 plastic ones.) Our spray bottles are from Wal-Mart and Dollar Tree. Some people save the spray bottles from commercial cleaning products to refill with their new homemade cleaners. Personally, I am hesitant to do this.

Labels: , , ,

6.12.2008

Organic and Local Eating

My thoughts on organic food from an environmental standpoint (and not a health standpoint, which may be the bigger concern for you): many chain grocery stores* have responded to demand for organic by transporting organic from the cheapest bidder, likely across the county. The resources to transport the organic food add back in pollution that the organic growing saved. Buying locally is perhaps a better choice and buying locally and organic is the best choice. Here's one article to get you thinking:
http://www.msnbc.msn.com/id/13737389/

BUT, if your family has decided that eating organic is important to you, your grocery budget is going to reflect that value and will probably be higher than others' budgets.

  1. Is there anywhere else in your budget that doesn't reflect your values as much, and you could cut back there to sustain your food budget?
  2. Do you eat out a lot? If so, keep in mind that most of that is probably not organic. Cutting out one meal out each week or each month might help you feel better about your grocery budget.
  3. If you shop at farmer's markets, make sure you are actually getting local produce. I went to one FM recently and afterwards I read their regulations online. At this particular one, there are no regulations about where the vendors come from, so things might not truly be local. Also, resale is allowed so these might not actually be farm employees who could tell you about how the food was grown. Heck, people could be buying from the grocery store and reselling it. We are happy to pay more for local produce, but we want to make sure it really is local. From now on we will stick with the other nearby FM that sets a radius for participants.


*I am not including Whole Food in this assumption. I am no big fan of Whole Foods, but in their defense over the past few years they have made a huge effort to buy locally and promote that they buy locally. If you read articles to the contrary, be sure to check out the publishing date. I got stuck on several negative articles that were several years old and thus before their shift.


Labels: , , ,

6.11.2008

Food Shopping– Part 2

  1. Learning to cut down a grocery budget is a gradual thing. Cut your budget by reasonable amount each month (say $20) and get used to your buying power at that amount before lowering it more. You have to grow into eating smaller and/or cheaper for it to stick.

  2. Pick an expensive thing you buy and try to half your consumption for the month. For me it was breakfast bars. I used to eat a Zone Bar every day at $1 a day and that added up. So, I switched to breakfast bars at $3ish per box and stayed with that for several years before I recently rethought that. Sure, $3 a box isn't expensive in the scheme of life, but I knew I could do better. My new tactic is to make a big batch of oatmeal-wheat muffins every few weeks. I freeze all that I won't eat in a week. I can add make them nutritious than a commercial product and they have no preservatives.

  3. We don't have a separate freezer or pantry, but we try to really use the space we have. Remove things from their packaging as much as possible to fit more in. Also, as yard sale season comes up, look for some organizer that you could fit on top of your fridge or in a coat closet. Those two areas have expanded our storing ability.

  4. Eat seasonally. Produce goes on super sale at certain times of the year. Stock up then! We eat tons of asparagus in the spring (best price ever, $1 a pound in spring of 07). We eat lots of cranberry items in the fall. Anyone can freeze their surplus, with the proper equipment you could can or dehydrate your surplus if you are into that. (We dehydrate with a $5 rummage sale dehydrator. I have canning supplies that I received as a gift, but have never gotten around to using those.)

  5. Love your slow-cooker. Tough cuts of meat are cheaper and after a day in the crock pot they are tender and flavorful. That would be one way to get cheaper organic meat (though you may have to call the grocery store and talk to their butcher to get stuff set aside if they don't normally put it out). If you have a Betty Crocker cookbook (the red plaid), or can get one at the library, it will explain the different cuts of meat and how to cook them to the appropriate tenderness.

  6. Milk and cooking: Use powdered milk when cooking instead of liquid milk. It is much cheaper. Unless the dish is milk-heavy (like pudding) the taste won't be impacted. You can also buy powdered buttermilk. If you can't find dry buttermilk, you can use your liquid milk to make buttermilk. Wikipedia gives these recipes: For recipes, a substitute for buttermilk can be made by adding 1 tablespoon of lemon juice or vinegar or 1 3/4 teaspoons cream of tartar to each cup of regular milk. The soured milk should be allowed to sit for ten minutes before being used. A low-fat substitute can be made by mixing equal parts of skim milk and low-fat yogurt or sour cream.

  7. Know what you have. I got sick of buying duplicate spices (man, those little bottles are expensive), so I made a list of what we have. It is so great when I want to make a recipe to just look on the list (hung inside the cabinet) and be able to see instantly if we have the right ingredients.

  8. If we know that we have something (like right now we have tons of flavored orzo from the discontinued product shelf) then we build a meal around that. Anything that calls for normal pasta gets served with orzo instead.

Labels: , , ,

Non-Food Products Grocery Savings

    Cleaning Supplies

    Moving to the dirt cheap organic homemade cleaners is cutting our costs, for sure (see green clean tagged posts). There just are a few basic, cheap ingredients required. Baking soda and vinegar are readily available and cheap. Borax is also readily available once I started looking for it (also cheap). Soda Ash/Washing Soda/Sodium Carbonate (three names for the same thing) was hard to find at first. From a pool supply store I bought Hot Tub PH Up which is the same thing with a fancier name (not to be confused with Pool PH Up which contains other things). It was rather pricey $8 for 1 pound. After awhile, though, I was able to find it in the local grocery store at 3 pounds for $2.49. A much better price!

    I suggest the books Green Clean, and Organic Housekeeping: In Which the Nontoxic Avenger... to get started on green cleaning. They will tell you how to do it and why conventional products aren't all they are cracked up to be. (Be extra cheap and check your library for them instead of buying them.)


    Laundry & Dish Soaps & Detergents

    Take a look at your soaps and detergents. Are they concentrated or say use one third less or similar? If so, the good news is that your product probably uses less packing than traditional ones. Yay! The downside is that in reality it is hard to use one third less. How exactly one can use one-third of a squirt of dish soap is a mystery to me. In this case, just be aware that your soap is super-concentrated and overusing it is literally putting money down the drain. So, stick to just one light squirt or add water into the bottle and shake to thin the soap out.

    Soap & Shampoo & Razors

    As for soap and shampoo, I always put them on my birthday and Christmas wish lists. Yes, that sounds strange, but hang with me...while my family thinks giving normal soap, etc. is lame, they are just fine with getting me fancy ones from Lush or the like. I am loaded up on fancy soap for probably two years after this past Christmas! Same thing with shampoo. While I am fine with cheap shampoo, my mom thinks it is girly-fun to buy me special shampoos. I go with it ;) I haven't bought razors in years. I either get them as stocking stuffers or I also take advantage of "free after rebate" razor offers in the weekend coupons.

    Ladies Only

    If menstrual products seem expensive to you, consider a Diva Cup (about $25 for 10 years worth of no tampons is a beautiful thing to some people). Want to go even more hardcore cheap? If you are crafty and have scrap fabric, make cloth pads or liners (you can also buy cloth pads from Etsy). If this stuff is not your style, that is A-OK with me. I'm just the idea lady!

    Labels: , ,

    2.17.2008

    Portion Size- The Stealth Saver

    1. Portion size matters. Keep your meat portions to the "right" size (3 oz/size of a deck of cards) and fill the rest of your plate with cheaper things like big salads, other veggies, fruit, and starchy things like pasta, rice, potatoes, beans, bread.
    2. Since we cut back on meat, sides are fair game for eating all of. Hey, they're cheap, fill up!
    3. Serve your food on small plates. You'll take less when there isn't all of that empty space to fill.
    4. Protect your leftovers. My husband used to eat into the entrees we'd meant for leftovers, so we now either portion that out right away (before serving) or decide together how much of the main course needs to be left untouched.

    Labels: , ,