More Green For Less Green

Living more eco-friendly for less money

10.20.2013

Gluten-Free, Dairy-Free Bulk Cooking & Lunches


As we continue our gluten-free (GF), dairy-free (DF) trial, we've rediscovered our love for bulk cooking. Our general approach to cooking is that Dave and I each cook one bulk meal per week. We eat some that night, keep some in the fridge, and freeze some to create a versatile freezer rotation. By combining fresh meals, leftovers, and freezer meals, we can eat all week despite only cooking twice. It's a great plan, but life with two tiny kids had made even that difficult. But, going GF/DF encouraged us to re-prioritize cooking. Our kitchen is messier now that we are back to cooking this amount, but we're enjoying some yummy, healthy foods without breaking the bank.

Here's what we've been doing: if we cook a whole chicken in the slow cooker, it gives enough meat for that night's dinner as well as leftovers for chicken salads (like Asian Chicken Salad) and general lunch munching.


Recently, we cooked a whole ham in the oven and that gave of loads of meat for dinner, lunch leftovers, a potluck, the freezer, and ham and bean soup. Amazingly (sadly), this was the first time I've ever had ham that wasn't injected with saline. Thank you J&L Green Farm for bringing us delicious, forested, unmodified pork.


Another week, we cooked a beef roast and utilized that in different ways through the week.


Toddler's plate with I-can-do-it-myself-sized portions.
Beef roast with potatoes and carrots, salad with cranberry vinaigrette, and a lot of mustard.

Another great bulk meal was shepherd's pie. Dave made this one up using ground beef, whatever veggies we had on hand, and a topping of mashed squash and chipotle peppers. The kids alternated thinking it was too spicy and shoveling it in.


For pizza night or easy lunches, it is easy to whip up a large batch of Mini Egg Pizzas (this was our first baked item with the frozen eggs.)


With all of these leftovers, coming up with GF/DF lunches isn't as overwhelming as I expected. Here are several ways we've combined things to create yummy bento lunches:


Bento Lunch 1 
squash shepherd’s pie
chicken
kiwi
corn
celery


Bento Lunch 2
corn chips (one processed food I am not ready to give up)
blueberries (the one berry we are not restricted on)
dried apricot
sprouted spicy thai trail mix
hummus
thin-sliced turkey


Bento Lunch 3
squash pancakes
pine nuts
blueberries
 bell pepper
 homemade cornbread with apricot preserves
 beef roast with potatoes and carrots
What do GF/DF things do you eat for lunches on the go (or for other meals)? We are hungry for ideas, as this is all very new to us.

Labels: ,

10 Ideas for Dairy-Free, Gluten-Free Meals

We are six weeks into doing a gluten-free (GF), dairy-free diet with hopes of it addressing health concerns for three out of the four of us in the family. Several doctors had recommended this to me as part of an anti-inflammatory diet after V was born and my pelvic instability was so intense that walking, sleeping, moving, really anything and everything was difficult. I had enough going on between new baby, work, and extreme pain, and many medical appointments that overhauling our family's eating seemed impossible. So, we shelved the idea. Fast-forward to now. As we've been looking at ways to address V's eczema, both our holistically-practicing medical doctor and our chiropractor suggested that V cut gluten, dairy (or at least pasteurized dairy), melon, oranges, berries, and juices. After a month of planning time, we were finally ready to do it.
The first week was the hardest, as 2.5 year old V had some major behavior and sleep disturbances that might have been some sort of withdrawal or might have been normal 2-year-old stuff.  He also had the most dramatic benefit—his eczema cleared up rapidly, at least until we stupidly tried a new soap that caused a major flare-up. His healing from the flare has been much quicker than normal, though. But, he still does get new patches of dry, itchy skin.

My chronic pain has been better in some ways and unchanged in others. For the past year-and-a-half, I've been waking up every morning with knee pain. This has mostly cleared up since the diet change. While I do have pain related to certain activities, the chronic inflammation went down. I also have less day-to-day pain in my lower back with the changes. That said, the real test is the surge of relaxin that happens each month based on my cycle. This time, I ended up with lightly sprained ankle along with the normal pelvic instability and low-back pain. But, it did heal in one lightning-fast week. Four weeks later, I ended up re-spraining the same ankle. Ugh! 

What else? Losing weight was not a goal for the diet change, but I did notice that my body dropped a few pounds and slid me under my pre-kids weight. Hooray for a chance to bust out some of those old favorite clothes I'd lodged in the attic. 

Dave has not noticed any changes with his contact dermatitis or gut. Baby E is just along for the ride. His biggest health issues have been reflux, which he has aged beyond, and cradle cap which remains. But, we know that sometimes the benefit of this kind of diet change can take 2-3 months. If nothing else, V and I appreciate the solidarity.

The biggest surprise to me was that we were able to do this without living in misery or resorting to loads of expensive packaged specialty foods. The kids have adapted well, and Dave even learned to make GF bread with our long-favorite Artisan Bread in Five Minutes a Day method.

Here’s the shakedown of what we've been eating.

Breakfast:


Paleo Granola Bars These are hearty, amazing, and smell like pumpkin pie


Potato and Sausage Egg Scramble We aren't doing Paleo, so potatoes are still in for us. We used potatoes we harvested ourselves from our community supported agriculural (CSA) farm. They are so fresh and delicious! As I've shared previously, we used our frozen eggs for this.


Gluten-Free OatmeaI like mine with some maple syrup, vanilla, and dairy-free chocolate chips. The boys like theirs mixed with applesauce and raisins or frozen pineapple.

Apple Pie Cinnamon Smoothie What can I say besides yum?


Dinner:

Buffalo Chicken “Pasta” We'll save ourselves $10 and make the mayo with a mild olive oil next time rather than avocado oil.

Squash Latkes We used almond flour in place of the wheat flour and topped these yummies with aoli. Our kids love these every single time!

Leek Potato Soup This was so creamy, I didn't even miss the cream.

Slow Cooker Tacos Al PastoThese tasted great in a wrap made of lettuce

TexMex Crockpot Carnitas We tried some GF-tortillas, but ended up preferring lettuce wraps. We also made "nachos" with corn chips, carnitas, beans, hummus, and guacamole

Artichoke Lemon Pesto Chicken Pasta We elected GF pasta instead of spaghetti squash that night.

We look forward to seeing what another month or so of this diet brings, though Dave and I are beginning to struggle with missing some of our favorite foods and coping at gatherings that have our old favorites.  The most humorous moment is probably when my employer generously provided a pizza lunch from Dominoes and thoughtfully ordered some gluten free pies. I took several pieces into a quiet room, removed the pepperoni, peeled off the cheese and trashed it, put the the pepperoni back down on the saucy crust, and then rejoined my coworkers to chow down. The slices were manhandled but delicious.

Labels: ,

9.09.2013

Using Thawed Eggs: Scrambled Eggs & Egg Hash

Awhile back, I wrote about how we got a great deal on farm fresh eggs and decided to freeze some for later. Well, we finally made it through the remaining fresh eggs on-hand and needed to dip into our freezer stash.

The first thing we noticed about the freezer eggs is that they defrost looking different than a fresh-cracked egg--the yolk is firmer and drier. The first time we defrosted some, we did it in a in an open bowl in the fridge overnight. We awoke to still-frozen eggs. We let them be for a few more days, by which point they were rather dry. They were usable, but not appealing. The second time, we used a non-air-tight container and let the eggs sit in the fridge for a couple of days. The were more moist this time, but still a bit off. The third time, we used an air-tight Pyrex bowl and transferred the eggs to the refrigerator mid-day. Ding, ding, ding! They ended up looking different than a fresh egg, but not unappealing.

Defrosted
I decided to scramble these, which seemed like a good choice for the texture. The whites cooked up like a fresh egg. The yolks held together, unlike the wiggly, breakable quality of a fresh yolk.


Whites are cooking nicely, yolks remain firm
I pressed down gently with a spoon to break the yolks up. It didn't ooze like a fresh yolk; it did something drier than a squish but moister than a crumble. The difference didn't matter through, as the yolk bits scrambled in with the white bits, the whole thing cooked up just like the fresh-gg scrambled eggs I'm familiar with. It was delicious!


Scrambled eggs, just like normal
We just started a dairy-free, gluten-free, berry-free trial at our house to help with various issues, namely V's eczema, and having the eggs on hand helped us kick off our first GF/DF breakfast wonderfully. We made a potato, egg, spinach, sausage hash with ten defrosted eggs (our recipe was inspired by this one).
Egg Hash
 
It was yummy, used up some of the massive amounts of potatoes we recently dug up at our community supported agriculture (CSA) farm, and made enough that we can reheat it for mornings later this week.

Digging for potatoes

Later this week, we'll give defrosted eggs a try again when we make Mini Egg Pizzas. We are curious to see how they do when baked.


Labels: , ,

8.12.2013

Me Versus the Yellowjackets

Our front garden is a haven for pollinators this summer, and we are thrilled! In early July, though, we noticed an influx of yellow jackets. I wasn't too fazed until one day I noticed dozens of them clustered near the path to our front door.


Upon closer inspection, I realized that they were zipping in and out of a hole in the ground. As I searched for information, I learned that yellow jackets have underground hives (sometimes huge ones), they can sting victims repeatedly, and they get more aggressive as the summer wanes. In other words--we were in trouble. How could we get rid of these creatures without spending loads of money and keeping green?

On the internet, the most popular suggestion was to pour gasoline into the hole. No way! Keeping our lawn a chemical-free play zone was key. This method is illegal, dangerous, and can have long-term consequences for the ground and its inhabitants. Rigging hornet spray on to a pole and putting that into the hole was another common suggestion. That seemed  complicated, dangerous, and we were worried about what that would do to our lovely organic veggies.

Ultimately, we decided that capping the hole with a glass vessel would be the easiest, safest, and cheapest tactic. The theory is that no wasps get in our out so the colony starves plus the glass creates a killer hotbox. But, would it work?  Since the yellow jackets were able to dig a hole to make the nest in the first place, wouldn't they just dig new holes and ditch the capped one? We had nothing to lose, so it was worth a try.

I waited until after dark one night to put a mason jar cap over the hole. Since yellow jackets go in the ground for the night, I could get close without much fear of being stung. The next day,  yellow jackets emerged from the hole but couldn't get out. They flew around inside the jar, contained.

By the second day, though, they dug their hole wider than the jar and a few managed to get in and out through the gap. I needed a bigger jar. In the dark, once again, I swapped out my containers. A thick, glass flower vase fit the bill.

As I worked, I  noticed several new holes had popped up in the yard. Interestingly, it looked like the escapees were digging down versus the trapped yellow jackets digging out. I put some jars on top of those, too.
 
The next day, scores of yellow jackets tried to leave the confines of the glass at the main hole, but they could not. Dead bodies piled up as the day wore on. I left everything alone it for several days. A few wasps still emerged and buzzed in the vase, but there were no escapees. The other holes stayed firm with no change. We were victorious...temporarily.


After about a week of nothing, more yellow jackets emerged. We suspect that the adults died out the first week and the second wave was babies that survived the famine as egg. With the vase still in place, they were all gone again after a day or two.

It has now been two weeks with no sightings. At one point, we talked about going out after dark one night, covered head-to-toe in thick clothing, to dump boiling water down the hole to eliminate any remaining life, but we think we are in the clear now.

Remnants of the yellow jacket hole

Labels: ,

7.03.2013

Brewing Kombucha: Step-by-Step


Now that you've gathered all of the supplies to make kombucha, now it's time to brew!

(If you are wondering what kombucha is, start here.)


Day 1: Brew

Today, you will need
  • 1 gallon water
  • 3-4 bags or 2-4 tablespoons loose leaf tea
  • 1 cup sugar            
  • 1 symbiotic colony of bacteria and yeast (SCOBY) and fermented liquid   
  • Pot
  • Spoon
  • Large glass brewing jar (mine is an old pickle jar)
  • Sieve (if using loose leaf tea)
  • Piece of cloth large enough to cover the jar opening
  • Rubber band or twine(Additional details about these items are here.)

  1. Boil water in the pot.
  2. Remove from heat and stir in tea leaves and sugar.

  3. Let the sweet tea cool to room temperature. (I go about my day and then come back to it when I have time.)
  4. Pour the room-temperature sweet tea into the glass container/fermenting jar
    • Strain while pouring if using loose-leaf tea.
    • If your SCOBY came in fermented liquid, be sure to add this to the jar. Alternatively, you could add a bit of store-bought kombucha. If you do not have any already-fermented liquid, plan for your first batch to take a minimum of ten days rather than seven. If you are maintaining a SCOBY hotel, refresh your backup jar with any remaining tea.


  5. Cover the jar with cloth and secure with rubber band or twine.

  6. Leave in an out-of-the-way, warm place out of direct sunlight (indirect light is fine).
Day 6+: Prepare to Bottle
  1. Clean the Day 7+ bottling and brewing equipment (see preparation instructions).
Day 7-10+: Bottle and Brew

Today, you will need

  • 3-5 glass bottles
  • Something to label storage bottles with 
  • Funnel
  • Sieve
  • Flavoring agents
  • All Day 1 supplies, if starting another batch
    (Additional details about these items are here.)
  1. One to two-ish weeks after you've brewed, it is time to bottle. The longer you wait, the less sugar will remain and the benefits of fermentation will be stronger. However, the taste will be more vinegary. Each family will have their opinion on when the brew is ready. We like 7-10 days. We did three weeks once, and it was not palatable.
  2. Inspect your SCOBY and the brew. Mold is bad. Colors in the realm of cream and brown are normal variations for a SCOBY. Bubbles also are normal, but not required.
    The bottom picture shows the various colors and textures that a healthy SCOBY can have. You do no need to remove the SCOBY from the jar (though you can, if you'd like to rinse off the stringy and chunky bits)
  3. If you are doing the continuous brew method,  boil water and add tea and sugar. Let sit in the pot to cool. (See Day 1 for a review, if needed)
  4. In the meanwhile, bottle last week’s batch. The dishwasher door is a great place to do this and contain any spills.

    E is not amused at being left out.

  5. Pour the kombucha into glass bottles using a funnel and sieve (to strain out debris).

  6. If you would like carbonation, leave a good amount of head room.
    The red is the kombucha. You can see  I've left several inches of headroom on this narrow-necked bottle. I'd leave less with a wide-necked jar.
  7. Leave some of the brew in the fermenting jar for the next batch (or to feed your SCOBY if you are not brewing again right away).
    The SCOBY remains covered with old kombucha in preparation for a new batch.

  8. You can drink your kombucha now, or you can flavor it and then do secondary fermentation. Flavor the drink by adding pieces of fruit, herbs, or juice into the bottles. A post just on this is forthcoming, but I'll share that my favorite is freshly squeezed orange juice plus the rind.
    Yummy organic oranges.

    Cranberry, mango, and plain

  9. Label the bottles with the date and flavors.
    A grease pencil works well for labeling.
  10. Let the filled bottles sit at room temperature for a few days to carbonate and undergo secondary fermentation (if desired).

    The top of the refrigerator is a good storage space in our small kitchen.
  11. If you are doing the continuous brew method, start your next batch by adding the cooled sweet tea from step 2 into the fermenting jar (along with the reserved fermented kombucha).
3 Days Later
  1. Put the bottles in the fridge to end fermentation (so it doesn't become alcoholic).
  2. Drink as desired. (Take it slow if you are new to kombucha. The benefits to your gut health can be a little too good if you start with too much, too soon.)

    Berry Kombucha

Labels: , , ,

6.29.2013

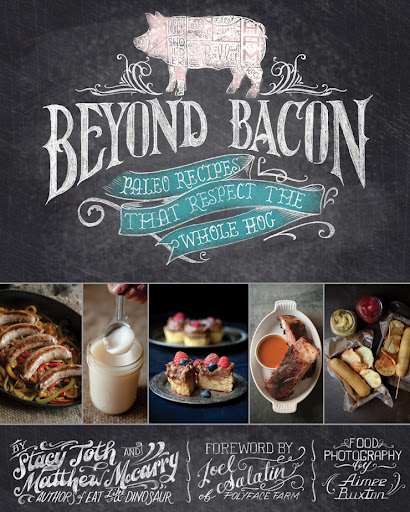
Guest Post--Book Review of Beyond Bacon: Paleo Recipes that Respect the Whole Hog

Over the past two years, I’ve grown increasingly aware of where my food comes from. My stance on organic produce used to be that, save for the dirty dozen, conventional produce didn’t faze me; local trumped shipped-in organic as the greener choice. But, I’ve come to realize that those chemicals not only impact the people who consume the food but also those who grow it. I want better for those people as well as the rest of the natural order around them.

My journey with meat has also progressed. After a period of being so consumed with the ethics of meat that it was difficult for me to eat, our family made the decision last fall to segue into buying locally and humanely raised meat.
One way to make this switch more affordable is to purchase whole animals or bundles. While I had my first experience grinding a beef heart this year (to mix in with ground beef), my guest poster today, Alexa, has been ordering whole and cooking whole animals for about a year. Using a whole pig piece-by-piece just got a lot easier thanks to the new book Beyond Bacon: Paleo Recipes that Respect the Whole Hog by Matthew McCarry and Stacy Toth, known in the blogosphere as Paleo Parents. Here is her review of the book.


There are a few things you should know about me before reading on:
1.   I cook a whole lot.  I often wonder if I spend more time in the kitchen than I do doing everything else combined.
2.   I am not what you would call a “reader.”  I very rarely read non-fiction books for pleasure.   It is hard to engage me long enough to get really interested in something unless it has a great story line.  
3.   I don’t like cookbooks much.  I think this goes back to #1.  I am not the kind of person who looks up a great recipe, goes out and gets everything I need for it & comes home to cook it up.  I am more the kind who opens the fridge, freezer, and/or pantry and uses whatever I have to whip up a meal.  Cookbooks just don’t usually fit into that.  
 
Enter Beyond Bacon...
I ordered a whole pig from my favorite local farm last year and have been cooking my way through it, so when Stacy and Matt from Paleo Parents announced that they were working on a new cookbook called Beyond Bacon, I was excited to have some new ideas to add into my family’s menu rotation.  I saved several of the more uncommon cuts so that I could try them using recipes in the book.   When I was lucky enough to get a preview copy, I flipped through it and was immediately drawn in by the amazing photographs by Aimee Buxton. The food looked incredible.  

I got it home and hoped to get some time to check it out.  Then it got lost in the shuffle of life with kids.  When I finally got a moment of quiet, I decided to reach for it.  That was it.  It had me at Bacon. I sat and read the entire thing. For several hours.  I thought everything looked and sounded amazing, but still wasn’t sure about using a cookbook for my family’s meals, so I decided to look for recipes that I could make using just with what I currently had in the house.  I hoped to find maybe one or two.  I started writing them down and once I got to fifteen recipes I stopped writing.  That’s right, over fifteen recipes with no special grocery shopping needed! Finally a book that just used wonderful real food ingredients that I buy anyway.  Amazing!  

Things I love about Beyond Bacon:
  • Wonderful information at beginning
  • Layout of the pages was very easy to navigate
  • Mouth-watering pictures of every recipe
  • “Notes” or “Tips” listed on many recipes were extremely helpful
  • Engaging story and/or information in the intro paragraph to each recipe
  • Division of the recipe sections by preparation
  • Farm house aesthetic
  • Recipes with real, whole foods without too many hard to find ingredients
  • Focus on pastured meats from sustainable, local sources
  • Encouragement and ideas for nose to tail eating
  • Great index listing both recipes and ingredients
  • Easy to follow instructions (even on more difficult preparations)

 Things I would’ve loved to see:
  • Full recipe list in one place (They are listed in the front of each section.)
  • Sample menus/combinations (There are some suggestions at the bottom of several recipes, but it left me wanting even more.)
  • A few more green vegetable recipes. (My family eats a whole lot of green veggies.


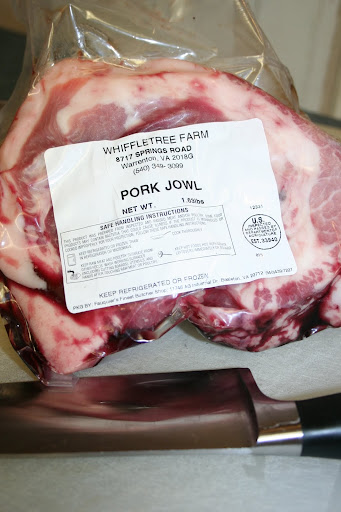
I set out to start testing and wanted to start with a cut I had been saving for months, the jowls.  I set myself to work on this one recipe and I worked my way through it (with lots of help from my little kitchen helpers).  

Once I was done with the recipe, I had a lovely pot of broth just asking to be used and some extra fat that I had trimmed from the jowls.  I flipped through again and found the egg-drop soup, lard and crispy lardons.  


I got four recipes out of my one jowl recipe! I love it when nothing goes to waste and we all eat well because of it.  I had planned on only making that recipe before writing this, but then I just couldn’t help myself.  I had to try more, so off I went to cook.  We are still eating our way through all the wonderful food!


Recipes I’ve tried so far:

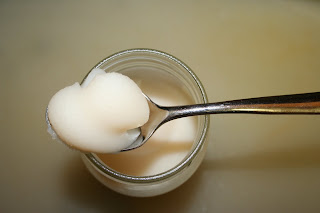
Lard
Was incredibly easy to do following the instructions in the book.  I have only ever done it in the crock pot before and mine has often been dark.  It was a beautiful snowy white this time!


Asian Short Ribs
These were incredible!  I’m still thinking about how 
good they are. Darn.  Now I have to go order some more short ribs.


Egg Drop Soup
I loved this!  What a wonderful way to have some protein with your healing bone broths. This will likely become a staple for me.

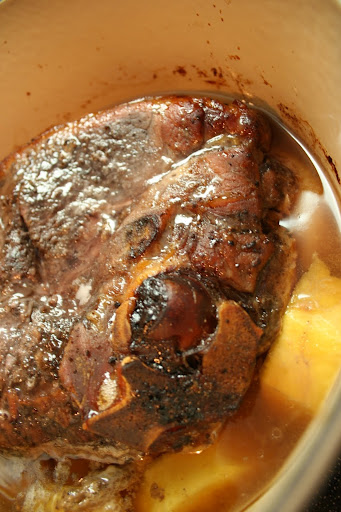
Ham Pot Roast with Horseradish Mustard Glaze
The meat was so tender and delicious.


Hawaiian Pork Roast
The sweetness of the pineapple was delicious with 
the flavor of the meat and spices in the marinade.


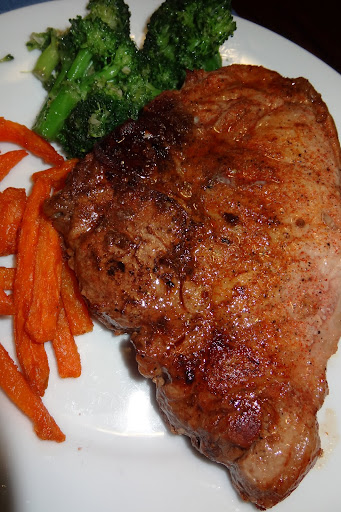
Perfect Pork Chops
Just like Stacy says in the book, I think steak and me have 
officially broken up.  Pork chops are my new one and only.


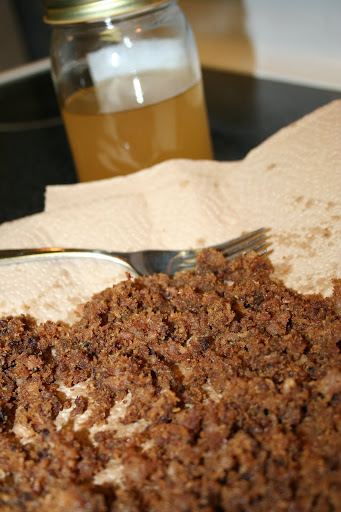
Crispy Lardons
My kids ate these for an evening snack.  
With a spoon.  Enough said.


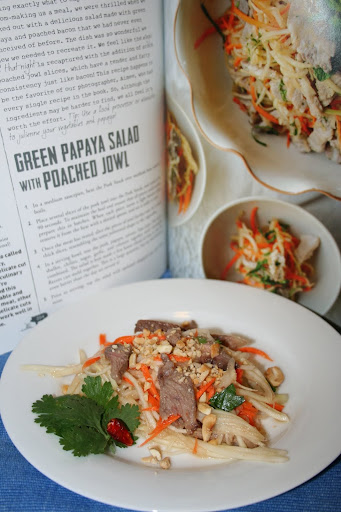
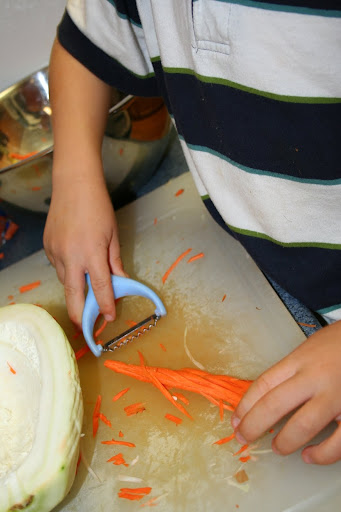
Green Papaya Salad with Poached Jowl
Amazing flavors in this one!  Will definitely be making again!

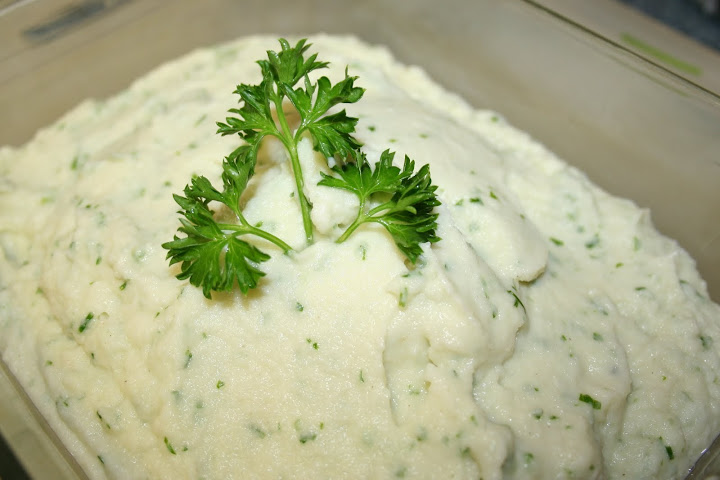
Mashed Cauliflower
The creaminess was delicious.  I added some fresh herbs and loved it!


 Faux-Tato Salad
The only one that got mixed reviews, but we were never big potato salad people anyway.  I was intrigued by cooking jicama as I have always eaten it raw. It does cook up to a  potato-like consistency, but I think I still prefer it raw.


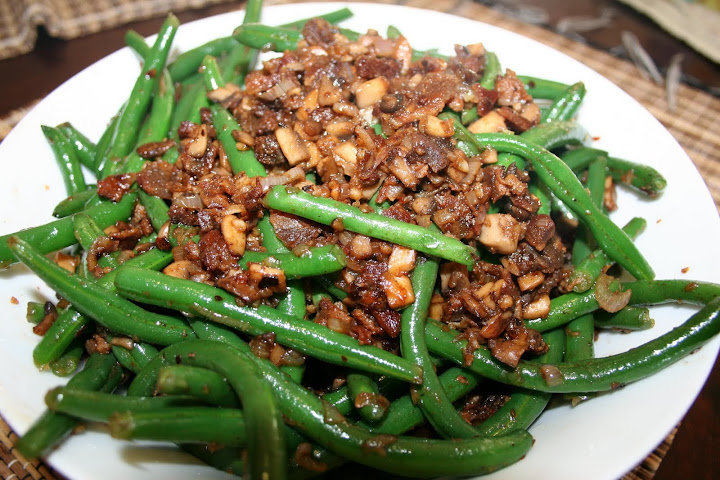
Sautéed Green Beans
A huge crowd pleaser.  Will enter dinner rotations immediately.  


Rosemary Carrot Mash
Another huge pleaser!  We make carrots all the time but have never mashed them.  So yummy!


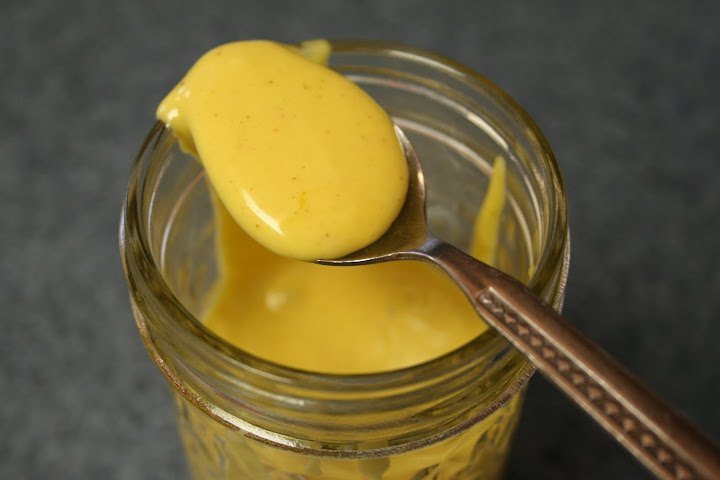
Baconnaise
I am a huge fan of mayonnaise but hate all the junk that is usually in store bought versions.  I’ve made my own many times, but this one is going to be my new favorite, for sure.


Ones I plan to try soon:
       Corn Dogs
       Sautéed Cabbage
       Triple Chocolate Freezer Fudge
       Scrapple
       Mexican Chorizo
       Lengua Carnitas
       Sweet Potato Drop Biscuits

...Who am I kidding?  I want to try them all

-Alexa


------
I am getting to ready to order a pork bundle that includes backbone, and I can't wait to see what the Paleo Parents have to say about preparing this. Beyond Bacon comes out July 2, 2013. It is available at Amazon.com and Barnes and Noble.

About today’s guest poster: Alexa is a stay-at-home mother of two and co-leader of the Northern Virginia chapter of the Holistic Moms Network. Growing up in a “crunchy-hippie” household, she has created the same for her own family. She believes that what you eat directly impacts overall health and well-being. This belief was further reinforced when giving up wheat in 2005 put a stop to the daily migraines she was having.

Today, Alexa concentrates on feeding her family real, whole foods sourced mostly from local and sustainable farms. She spends her days homeschooling her children, cooking delicious meals for the family, and continuing to nourish her local Holistic Moms community who has given her so much.

Labels: , , ,