I’ve been absent for a while on the blog, but with good cause. We bought a house in November and have been working hard, hard, hard to make it livable! We started our housing search in January of 2009 with some strict, but not totally unreasonable guidelines: single family home, 3+ bedrooms, 2+ baths, a yard with potential for vegetable gardening; a fireplace and dining room would be nice. We knew we wanted a small house—lower utility usage (and bills), less space to fill, cheaper to make eco-friendly upgrades because things just aren’t as big, etc. We also knew we wanted to live in a very specific area near our offices. Because of the size we wanted, that left us with only about four neighborhoods, albeit rather large neighborhoods of homes that were built from the late 40s to the early 60s. Oh, and it had to fit our tight budget. So, maybe not such an easy thing to find…
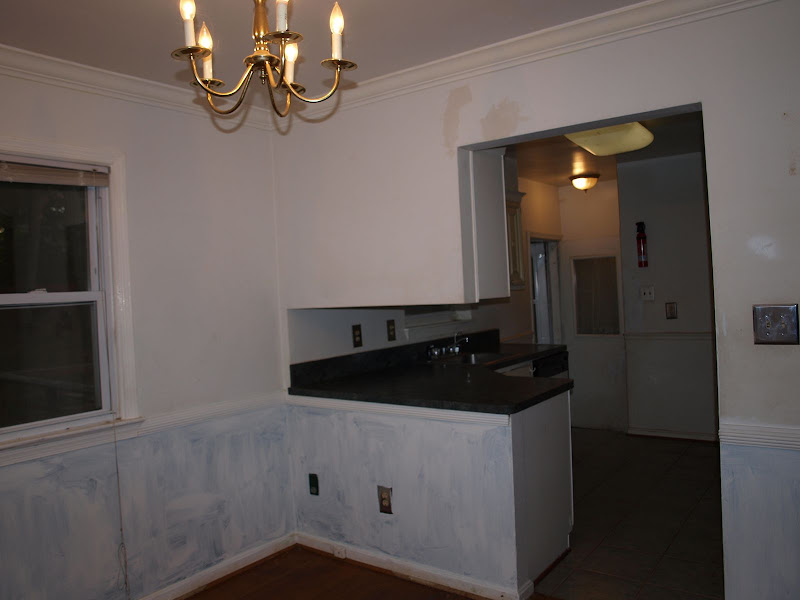
Over nine months we looked at over 50 houses and put offers on 11 of those houses which breaks out as 5 foreclosures, 3 short sales that we were outbid on, and 3 short sales that we “won” and entered the long, frustrating process for. We ended up with house number 11—a foreclosure that had been vacant for just 1.5 months. Built in 1954, it was made very solidly with brick and old wood that lasts forever and just isn’t around anymore. It has three legal bedrooms on the main floor, one illegal one in the basement, two bathrooms, a fireplace, dining room, two kitchens, and a great yard. It also had some downsides—some big, some small: writing on the walls, a little mildew in the basement, a raging cockroach infestation (and thus droppings over every surface), a putrid smell, neglect.
We—and a team of generous friends and family plus some professionals—worked for three weeks before we moved in to get the house livable. We came to the work with four major mindsets:
- Focus on livability not aesthetics (at this point). We want to live in the house and see how it feels before deciding to make changes. For example, we want to learn the ins and outs of how our water pressure works before doing a grey water system. We want to watch the sun over the seasons before deciding if we want to save up for solar panels. This also allows us more time to find used things that we really love, like a neat lighting fixture for the bathroom.
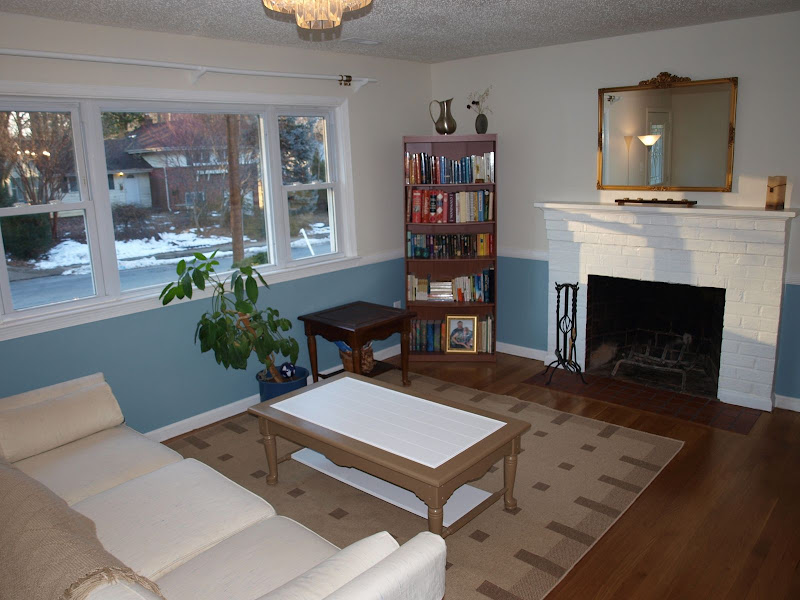
- Preserve as much as possible We don’t believe in updating just for the sake updating. So, the turquoise tub stays, the floorboards with staining don’t get replaced, we spray-paint the brass fireplace façade instead of replacing it.
- Make wise purchasing choices We try to buy used things first and borrow things that are borrowable (like tools), and then buy low-impact products when we must buy new. When we do buy conventional, we do it with a well-thought out reason and occasionally we allow ourselves a fun, conventional splurge (the new shower curtain that I adore) but that is the exception, not the rule.
- Green clean We hired a green cleaning company to get off the first layer of filth and clean out the dead bugs and then did all remaining cleaning with homemade green cleaners. We did all mildew remediation with vinegar and borax.
We’ve had some great ups (the dishwasher we thought was broken actually wasn’t, friends and family who were AMAZINGLY generous with their time) some downs (small hole in the roof, the heat breaking two days after we moved in) and we’ve got lots of work ahead of us, but it feels good. Here’s a bit of our journey told through pictures with commentary…

Before: Our adorable home. It has tons of potential, but tons of work to do! To start, we've got mushrooms popping up in the front yard from a tree stump decomposing. The paint on the fascia boards is in bad shape. The gutters are cracked and worthless.

In progress: The previous owners removed a satellite dish but didn't plug the holes. This rotted out the soffit, fascia board and a joist. All of the fascia boards needed to be scraped and painted, but most were in great condition (yay 1950s construction old growth wood that is still trucking on).

After: New gutters, painted fascia boards, some roof repairs, stump removal, and a fresh blanket of snow!

The first time we saw the house the electricity wasn’t on and we though the house had a mold problem because of the black everywhere. On our second visit (the inspection) we had electricity and realized it was cockroaches—dead and alive— and their droppings. Yuck!
Check out the corner of the front door. Yes, they are cockroaches and yes, they are alive. Many of their dead friends were also around. We asked for an exterminator in our addendum.
.JPG)
That is dead, smashed bugs. Every place where two surfaces touched was covered in either cockroach bodies or their droppings. The house had only been unoccupied for 1.5 months at that point, so people obviously had been living in this.

We had professional cleaners (an eco-friendly cleaning company) for 5 hours plus many, many additional hours from family & friends & us.

We used all eco-friendly homemade cleaners from the book Green Clean. We spent three weeks living in our old place while we fixed up the new place. Until we had a sufficiently cleaned surfaces to set stuff down at the new place, each night I would take the empty
bottles back to the condo to reload for another day of hardcore cleaning.
The green bottles are for the kitchen and contain a degreasing formula (Castile Cleaner: 1t washing soda, 2t borax, 1/2t castile soap*,
2c hot water, 10 drops of essential oils, Green Clean p.136).
The pink bottles are a mildew-buster formula with vinegar for bathrooms and the basement (Scented Vinegar Spray: 1t borax, 1 T castile soap*, 1/8c vinegar, 2c hot water, 5-10 drops of essential oils, Green Clean p.136).
*Shredded castille bar soap, not liquid. See
this entry on how to shred bars easily. I suppose you could use liquid, but it forms creepy, greasy globs when mixed with vinegar so, I stick to the bars.
I’ve lived by these Green Clean recipes for almost two years now, and they pulled through for us on this mega job! If we could green clean THIS, anything can be green cleaned!
I am tempted to finish this blog entry here, but I'm afraid you will think we are totally crazy and disgusting for living in this house if I don't show you some real "after" pictures. Because I am obsessed with my new shower curtain, let me show you the bathroom. (Bonus: if you know me in real life and have already seen the picture album, at the end is a new picture you haven't seen!)

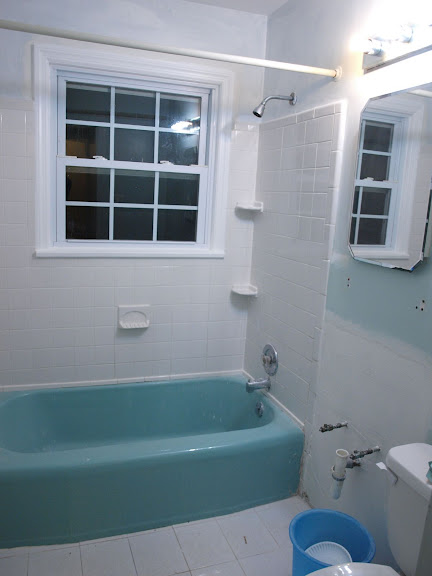
Bathroom Before:Rotting window sill, cracked floor tiles (not visible), general ickiness, then we discovered bad plumbing in the sink and that the vanity was rotting.

Ickiness Close Up

Bathroom progress: Damaged vanity and sink faucet removed, cleaned (several times), and a lovely new hand-crafted window sill (inside and outside)installed. The sill now has an angle to it so water won't collect plus it now has exterior paint on it. My dad headed up the window sill project. It seemed like tedious, precise work but he did an amazing job. Go dad! (And thanks to my mother-in-law for cleaning and my father-in-law for patching and painting the stained, crumbling ceiling.)

Vinyl lining added to lower part of window for privacy. Ick, plastic! But, this was a place where it seemed the best option. We bought the vanity new and while it looks great, it bugs me that we bought something new out of pressboard. Oh well. You can't win them all. On to happier thoughts: I adore this shower curtain! I wanted something to tie in the green and tan towels we already have but also work with the turquoise tub. You can see it better in the next pictures. (Update: It is from Target.)

Bathroom after: Painted
Gold Buff (Olympic zero VOC paint), vintage lighting fixture and lightly used towel rack both purchased from the Habitat for Humanity ReStore installed, used eterge purchased from family member installed (not visible in the picture). The faucet is new, but we splurged for solid brass in hopes that it will last a lifetime.
Still to do: fix the things the picture doesn't show--the cracked floor tiles need to be removed, proper flooring support added, and new flooring put in. The ceiling will need to be replaced. It was in bad shape from a past ceiling leak and our patch job is already falling apart because of the moisture.
See...the grossness
can turn into something adorable! I look forward to sharing more with you.
Labels: Cleaning Green, Our House


 In progress: The previous owners removed a satellite dish but didn't plug the holes. This rotted out the soffit, fascia board and a joist. All of the fascia boards needed to be scraped and painted, but most were in great condition (yay 1950s construction old growth wood that is still trucking on).
 After: New gutters, painted fascia boards, some roof repairs, stump removal, and a fresh blanket of snow!
.JPG)
 We had professional cleaners (an eco-friendly cleaning company) for 5 hours plus many, many additional hours from family & friends & us.


