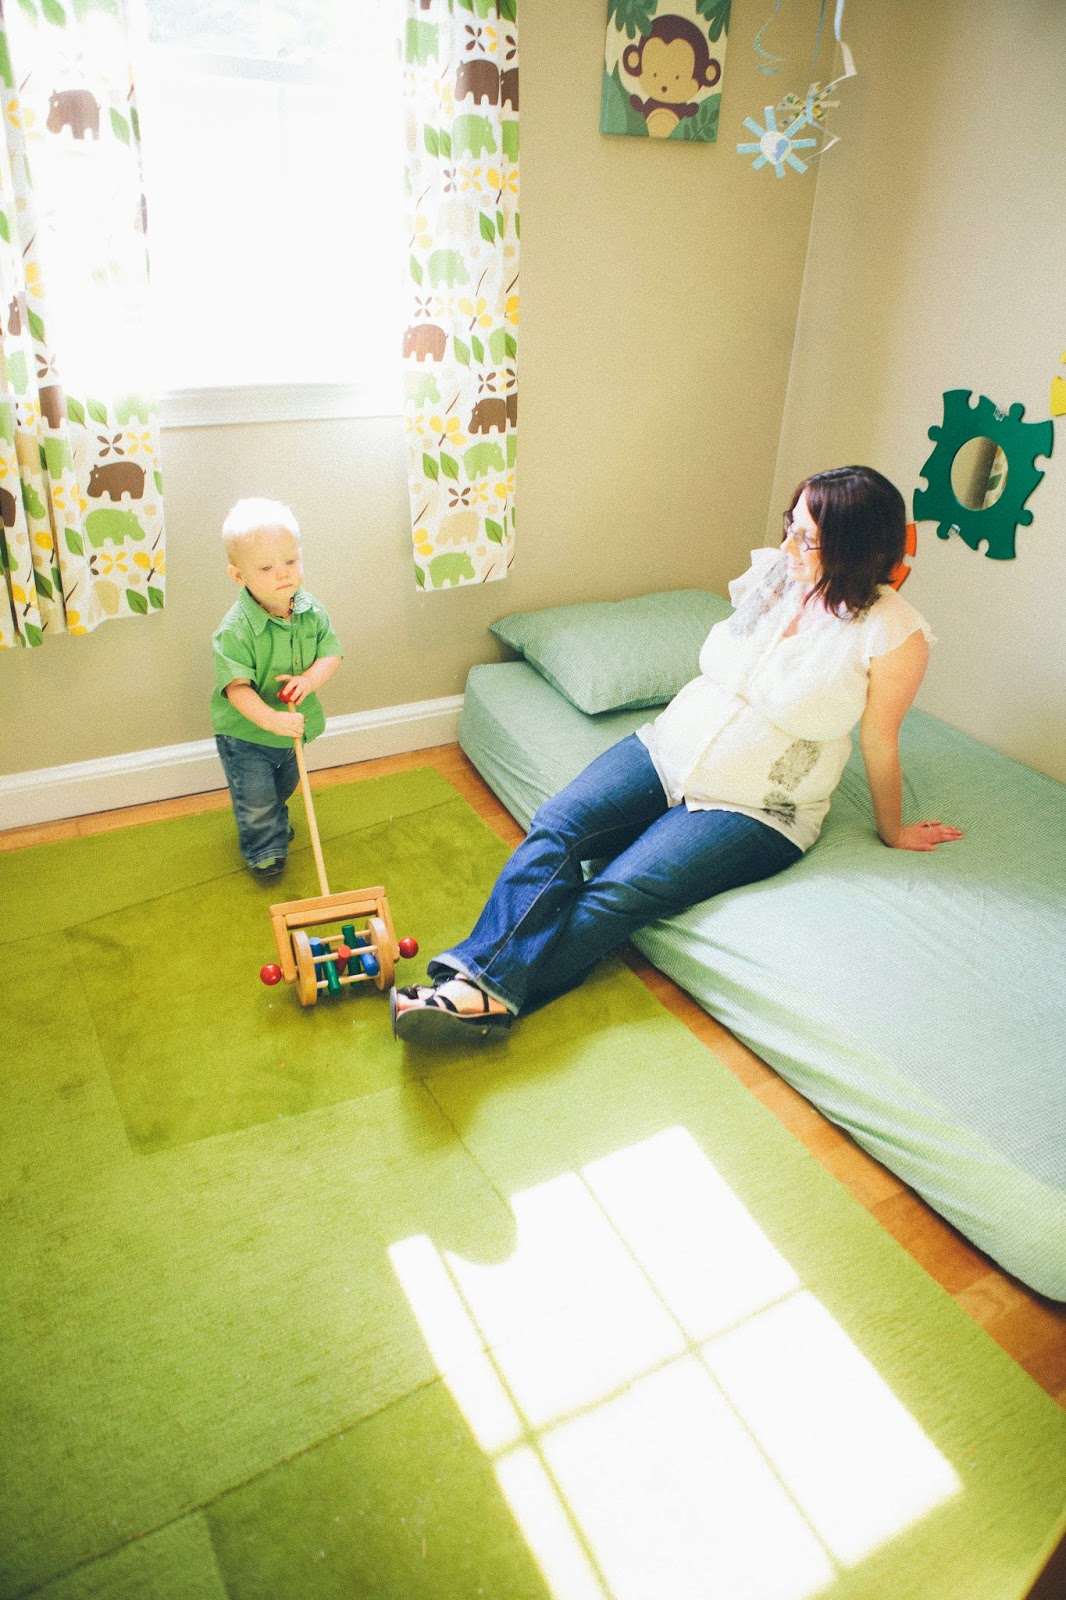
2.26.2012

Crib Part 3: Turn a Crib Into a Side-Car (Co-Sleeper)

It is time for the last of my baby bedding series. This one is on the crib side-car, which is attaching a crib to an adult bed, like this…


Many families who want this setup elect an Arm’s Reach Co-Sleeper, and with good reason: it is a great concept, the brand has a great reputation, and there aren’t many comparable solutions for beyond the newborn stage. We seriously considered the Arm’s Reach, but then we heard about side-carring a normal crib—a simple concept, but one that can’t be marketed so it isn't as well-known—we wanted to learn more. Well, we learned about it, executed our plan, and now I share with you what worked for us.

How to Side-Car A Crib

Step 1: Select a crib that is stable with one side removed
Our crib converts to a toddler bed, so we were certain it would be stable with only three sides.

Step 2: Make sure the crib fits in your space
Measure the crib and make sure it will fit in your space. Think creatively about how you can move your bed or other furniture. Which layout works best for your space? Left side of the bed or right side? Have baby closer to your head or closer to your feet? Could you affix the crib along the foot of the bed? We went through several incarnations before we settled on a plan that worked. At various times we had crib on the left of our bed, crib on the right of our bed; nightstand above the crib, nightstand below the crib; nightstand facing one way, nightstand facing the other.

Step 3: Get your mattress and baby’s mattress to the same height
There are several possibilities for this
· Raise or lower your bed frame
· Raise or lower the crib’s legs
· Raise or lower your mattress
· Raise or lower the crib mattress

Ideas for altering the bed frame or crib legs: use wood blocks as risers, cut the legs down (if you are brave)

Ideas for altering mattress height: remove the boxspring , alter the mattress platform, consider different mattress depths, put a thick blanket under the mattress, put a sheets of wood under the mattress

For us, baby’s mattress was higher than our bed. We talked about custom-cutting wood risers for under our bed frame, but ultimately we modified the crib’s mattress platform. The mattress platform on our crib attaches via four small pins that fit into pre-drilled holes. Hubby simply drilled new holes for the pins at the height we wanted. Each crib’s mattress platform will affix differently. If you make any adjustments to the crib, you must verify that the new setup is secure. I do this by getting fully in the crib and shaking it. I do this periodically to ascertain that everything is still secure.


Step 4: Attach the crib
The simplest option is to pin the crib between your bed and the wall, but this isn’t always doable. We have a small gap between the crib and the nearest wall. Shifting the bed could have solved this, but we liked the aesthetics of our bed centered on the wall. Also, at one point my nightstand was above the head of the crib so I could use the surface, and we did our initial measurements factoring that in.

To secure the crib to our bed frame, we used two adjustable clamps. Per clamp, place one clamp head on the inside of the crib frame; place the other clamp head on the inside of the bed frame. Tighten down the clamp until it is secure. Repeat with at least one more clamp at the other end of the crib.

Adjustable clamps can be made of plastic or metal. The one in the picture is metal., however the one on the far end of the crib (which you can’t make out) is the plastic kind. Either will suffice. We went with what we had on hand, which was a mix.


Step 5: Minimize the gap in between the mattresses
Since the crib is missing one of the sides that would normally hold a mattress securely in place, there will likely be a space where you mattress and baby’s mattress touch. It may just be some wiggle room or it may be more considerable. Safe crib guidelines say that no gap should be larger than what two fingers can fit in. If your gap is larger than that (or could wiggle to be larger than that) you will need to address it.

Push the baby’s mattress tightly against yours and then fill the space on the far side with something that will not be a suffocation of strangulation hazard. Our gap was fairly small, so we used foam pipe insulation. For a larger gap, you can try a pool noodle. A rolled-up sheet or towel may also work if you can wedge it in tight enough that you feel secure it will not dislodge. Foam, as a synthetic, is never my first choice, but our gap was too small for the other options I tried. Baby naturally hangs out on the side closest to us, so he has never even noticed the foam.


I did purchase a “bed bridge” from Bed, Bath, and Beyond that is normally used to make two twin beds into a king (like cruise ships and some hotels use), but it didn’t solve the problem of shifting and it meant that I couldn’t use fitted sheets on our mattress or baby’s, so I returned it.

Step 6: Address any other gaps
Remembering the “no gap larger than two fingers” rule, carefully look at all sides of your bed and baby’s. Are there any gaps? Are there any other places where baby could get stuck? For us, our headboard was a culprit. There was a large space between the bottom of the headboard and the start of the mattress. Our options were removing the headboard or filling the gap. We filled the gap with a painted piece of wood. Multiple pillows and blankets also create gaps, so stick to one pillow per adult and plan for only one layer of covers to go higher than your waist.


Step 7: Enjoy!


In this picture, you can (sort of) see one of our earlier set-ups. The crib is on the other side of our bed with the crib closer to the foot of the bed than the head, and the nightstand is above it with drawers accessible.


-------------------------------------


Frequently Asked Questions About Co-sleeping

Are co-sleeping and bed-sharing the same thing?
Technically co-sleeping is any sort of rooming-in with baby. Bed-sharing is a specific type of co-sleeping. As the name implies, it is sharing a bed with the child. A side-car is a hybrid setup: more than general cosleeping but not quite true bed-sharing.

Why use a side-car instead of a co-sleeper or a bassinet?
Our mattress is the most expensive piece of baby gear we have, so we want to maximize its use. The cost of the mattress is a reflection of its value to us and the quality. We wanted a high-quality natural mattress because babies spend so much time sleeping. We planned to borrow an Arm’s Reach Co-Sleeper from a friend, but ultimately decided that it didn’t make sense to us to put so much research-time and money into our baby gear pièce de résistance only to have baby sleep in something less thought-out. Plus, as part of our overall lifestyle, we are gear minimalists. Why have two (or three) sleeping contraptions and sets of specially-sized sheets when we can have one? Another plus: the crib is large enough that even a toddler can sleep in it comfortably. Basinets and dedicated-co-sleepers max-out sooner.

Why use a side-car instead of bed-sharing?
I didn’t have the courage to bed-share when V was a newborn. I don’t mean that as an insult to people who bed-share—I have no qualms about others bed-sharing from birth, if they know the rules— I just wasn’t at that point yet. Also, our bed is a queen-size and I just didn’t think we’d have enough room unless we upgraded to a king. (I later learned that I was wrong, a queen is cozy but fine.)

Additionally, I had a difficult pregnancy and recovery, and as part of my issues, I could only sleep semi-sitting with my legs bent. I used seven pillows (including a wedge and Snoogle) to do this. Safe bed-sharing requires only one pillow per adult. This way of sleeping also meant that I couldn’t sleep on my side to do the” protective cuddle curl” that works so well when bed-sharing with a young baby. Because I couldn’t cuddle up with baby, we used a swaddle blanket, which is not advised when bed-sharing. Laying him next to me in his own space and sleeping with my arm on him was the best of both worlds.


Now that he is older, and I am more healed, we primarily bed-share and the co-sleeper is more for reading and playing with soft, quiet toys when V wakes up earlier than hubby or I want to get up.

Why do you sleep co-sleep?
If you are curious about co-sleeping (or skeptical of it), I recommend Sleeping with Your Baby: A Parent’s Guide to Cosleeping by Dr. James J. McKenna, Director of the Mother-Baby Behavioral Sleep Laboratory at Notre Dame, for a comprehensive look at the scientific and cultural/historical whys of co-sleeping (specifically bed-sharing) and how to do it safely. He says it much better, and more comprehensively, that I can. If I see you regularly in-person, you are welcome to borrow my copy of the book.

For myself, quickly I can point out: it allows me to (mostly) sleep through nighttime nursing session; with young babies it helps them regulate their body temperature and breathing and reduces the SIDS risk; neither hubby nor I have to fully wake to attend comfort a stirring baby; when V was little and required many nighttime diaper changes, I could change him without getting out of bed .

V is almost 14-months as a write this, and at this stage we feel co-sleeping helps him get ample emotional parenting during the night with minimum disruption to our sleep. His biggest nighttime needs right now are loving pats and snuggles, more so than nursing or anything else. These days, he sleeps between hubby and I and mostly wants to cuddle with hubby all night—what a beautiful way for a working dad and child to reconnect! (Note: Sleeping next to mom only is advised for young babies. We only made this transition after V turned one and demonstrated the ability to “defend” himself if needed.)


Will your baby fall out of bed?
When V started crawling at nine-months, we set up a floor-bed in his someday room. He starts the night there if hubby and I plan to stay up for awhile. V also takes most naps in his room. V does sometimes sleep in our bed alone, and we are comfortable with that because he is not a roller; when he wakes, he generally sits up and cries out for us; and for those times he wants to be adventurous, we’ve taught him how to flip on his tummy and repel down the bedding to get to the floor.

I need a nightstand. What do you do with all of your stuff without one?
You could create a setup where your nightstand is accessible.

We moved my nightstand from above the head of the crib where I could use the surface but not the drawers to the bottom of the crib where I can access it all. It means I only have a small space to get out of bed, but I like having somewhat-close access to the nightstand.


For those things I want at arms-reach in the night, we use a clothes basket. When V was younger and needed lots of nighttime diaper changes, we also kept a diaper-change bag in the basket so I could change him without getting up. The safest rules for cribs say that there should be absolutely no items in the crib save for a fitted sheet, so use a basket with caution. I felt comfortable with the basket because it has breathing holes; in the rare event that should baby turn around, wiggle down, and smash his face into the basket, I didn’t feel he could suffocate on it. Also, I made sure to never put anything in the basket that baby could choke or strangle on.

9.27.2011

Wearing Baby In A Woven Wrap


I am a guest blogger on the Beltway Babywearers site today writing about how wearing Baby V in a woven wrap has helped me thrive as a parent despite chronic back pain. Check it out here.


While a high-quality woven wrap is not cheap, it is one of those things that is worth spending a bit extra money on upfront to get a lifetime (or more) of use out of. People shell out hundreds of dollars for strollers, which have pieces that eventually will wear out or break. A carefully selected woven wrap will allow baby to be toted from newborn days to early childhood and then left in good enough condition to resell for most of its initial value or to hang on to for passing to the next generation someday.

Name brand woven wraps generally are made in Europe, which has strict standards of production, and made from natural fibers. Wrap companies generally do their weaving in small batches, creating true artisan products. Wraps also can make impromptu blankets, table cloths, nursing covers, shirts, forts, sturdy hammocks, etc.

It is rare that I get enough excited enough about a product that I to want to start a collection, but wraps are so comfortable, functional, beautiful, natural, re-sellable, and enduring that they've caught my attention!

You can find used wraps in various brands, colorways, and sizes for sale here.


For a primer on all things wrap related, check this out.


8.01.2011

Bulk Freezer Cooking and Glass Food Storage

We are big on cooking in bulk and then creating freezer meals with the rest. I figure, if we are going to go spend the time cooking and cleaning up the kitchen afterward, we might as well feed ourselves as many meals as possible from that effort. Because meals last so long in the freezer, we can get a versatile stash of meals built up and rotate through them so our palates don’t get bored.

We've experimented with once-a-month-cooking (OAMC) from cookbooks and blogs. We’ve prepared food in bulk at Let's Dish (which we really enjoy and makes a fun date night but is a splurge for us cost-wise). Ultimately, we've discovered that cooking and freezing our tried-and-true normal recipes works best for us. Some of our favorites include white chicken chili, hummus, sweet and spicy pork, French dip, and cranberry carrots.

While zipper plastic bags and foil pans are options for storing meals in the freezer, we avoid disposable products. Plus, I don't like heating food in plastic. Given that, glass seemed like our best bet. We decided to go with Pyrex because it is safe for freezer and oven and the lids are BPA-free.

Pyrex is not cheap, so we built our stash slowly. Several years ago, I stalked the advertisements for Black Friday for the sets that we wanted. I am not a tidy-house person, but I do love a tidy cabinet, so we decided to pick several sizes for our Pyrex and just get those so they could be organized easily.


Rectangles in three sizes on the left
Rounds in four sizes on the right
Lids by shape and size in the middle


Our families love to use wish lists for gift-giving, so I added the exact sets we wanted to my Christmas list and let the family know that duplicates were great. That started things off. Over time, I continued to ask for Pyrex sets for gift-giving times plus I check for them on clearance shelves and each year we look for them on Black Friday and get more.

Pyrex also now offers water-tight lids, which is great for bringing defrosted soup to work for lunch. Pyrex does make glass lids, but these merely sit on the container and do not seal. Here are Pyrex’s food storage containers.

7.18.2011

Baby's First Foods: No Jars, No Blenders, Just Real Food (Baby-Led Weaning)

Baby Boy V is now a solid food eater! As people who minimize buying packaged food, jarred baby food was never on our radar. Packaged foods just create so much waste. While recycling is great, we try to do things in this order: reduce consumption (or do without), reuse something already produced, and then if there are no other options: buy something new that can later be recycled.

We talked about making our own purees, but that seemed like a lot of work. Something like the Beaba Babycook makes it look easier, but what a price tag! Biggest of all, the idea of purees—and of babies eating special, separate food— just struck me as a cultural thing rather than a universal baby well-being issue.

Enter baby-led weaning (BLW) also called baby-led solids (BLS). This method feeding, where babies feed themselves from the family meal, seemed like the perfect choice for us. The book Baby-Led Weaning by Gill Rapley was a comprehensive resource for understanding the amazingly compelling how and why of this method. The Adventures in Solid Foods blog is another wonderful source.

As V approached six months* old, he blossomed into being ready for solids per BLW guidelines. One week before his “semiversary” he became a sturdy sitter and he went from just lunging for our food to actually mock-chewing while hubby and I would eat. V had already been able to bring toys to his mouth with confidence, doubled his birth weight, and no longer had a tongue-thrust reflex.

*The six-month mark is key to BLW, but there is compelling evidence for six months as a benchmark no matter one’s solids method.

From the first week, we offered a variety of foods that generally corresponded with what we were eating:

Apple Take 1- We picked up a slice of apple from the farmer's market and let V explore while being worn close to daddy in a mei tai. He licked it twice then dropped it. Take 2- We offered another slice at home a few days later. V wasn't a fan that day either. We'll try again later.
Pear A thin slice of pear was a hit! V got off a few bites and swallowed his first food
Pork We shared from pit barbecued pork with V while eating out. He scowled at it, then mashed it around for ages in his mouth, tried a few times to swallow it, then spit it out.
Squash I pulled this out of mixed vegetables that I was sauteing for a wrap for my meal. V was tired and melting down.
Mango This was too mushy and slippery to stay in V's hand for more than a few licks. We'll try again with a heartier piece.
Water V did great with having a few sips of water from a small glass with a curved edge.


In week two he tried
Lettuce I pulled this off my sandwich while eating lunch at Chick-Fil-A with friends. V licked it, ripped it, then threw it on the floor.
Roast beef Beef au Jus was on the menu at grandma's house, so I have V a slice to hold and explore. He got off a few tiny bites and swallowed them.
Eggplant Take 1- I pulled a long wedge of eggplant out of a sauteed veggie wrap I had made for myself. He loved it and sucked all of the flesh out, leaving just the skin. V's cheeks and thighs (where he had banged the eggplant)turned red after. Perhaps something else in the wrap bothered him or maybe garlic and onions cooked in the same pan. He cleared right up with soap and water.
Pizza crust I gave V a bit of crust from a thin pizza that had a wee bit of tomato sauce on it. He like it.
Cucumber I am allergic to cucumber, but I know this is a very rare allergy our doctor said food allergies are not passed down. Cold cucumber is supposed to feel great on sore, teething gums, so I wanted V to give it a try since he got in his first two teeth that week. V mashed on it happily for a minute, then dropped it.
Pineapple Fresh off the grill (but cooled down). It was a hit, even if quite squishy.
Asparagus This was perfect for a little hand to hold onto well. We served it microwave-steamed.
Banana I am banana-phobic so hubby gave V this at breakfast while I was asleep.
Oatmeal V fed himself with a spoon from daddy's bowl
Tuna Steak We have V a small chunk of grilled tuna steak. He was ambivalent about it--just like his parents.

V will still get most of his nutrition through nursing for some time to come. But, for now solid food is great fun for experimentation, socialization, and exploring new flavors.

7.11.2011

Crib Part 2: Choosing an Eco-Friendly Mattress

I am not hysterical about conventional products, but I do try to be an educated consumer when I buy something new. I'll be honest. Often what I find is depressing. Mattresses fit this trend. Most conventional mattresses (for babies and adults) are made with things that are concerning when one really looks into them:


  • Polyvinyl chloride (PVC) This plastic is restricted in the European Union in children's products. It can leech when put in the mouth (think soft, plastic children's toys), its production is bad for the environment, it is made from politically-charged crude oil, and it can off-gas.


  • Polyurethane is not regulated for carcinogenicity, it facilitates the life of dust mites, and it is highly flammable which means it must be treated with chemicals to be allowed in products.


  • Chemical Fire Retardants These end up in measureable amounts our bodies, breastmilk, meat we eat, etc. and are associated with thyroid and hormone changes including decreased fertility.
Knowing all of this, I continue to sleep on my 10-year old conventional mattress (for now), but I wanted to start baby V off on something healthier. In preparing for baby, we used the organic mattress suggestions in Baby Bargains as the basis for our research. Here is what I thought about the suggested brands (which I've divided into two categories):


Seem Like Greenwashing


  • Colgate Eco Classica 1- This one is a greener option, but not as excellent as I was looking for. I am leery of anything soft made from bamboo. The amount of processing it takes to turn bamboo into fabric is anything but green. $190


  • Sealy Posturpedic Springfree- This contains soy which is another one of those things, like bamboo, that sound great but actually are very taxing on the environment. $199


  • LA Baby Organic- Baby Bargains talks specifically about the one sold at Costco. When I looked into it when I was pregnant, it came across as having an organic cotton cover, but being otherwise conventionally made. It smacked of greenwashing to me. Some of LA Baby's mattresses seem to have more potential, but I do have to wonder what corners they cut to have such a huge price gap between them and the solidly green brands (for example saying no toxic chemicals versus saying no chemical fire retardants as on the solidly green brands. Does that mean they use a non-toxic chemical fire retardant and who is defning non-toxic since the government allows mattress companies to use something that I find toxic but they don't.) The Costco version is $107.


Solidly Green


  • Natura's Latex Mattress- I wasn't interested in latex at the time and I was intimidated by needing a wool cover for this mattress. I am now more educated on the benefits of latex mattresses and wool for water-proofing and would be open to this brand now. Non-organic models run $360, organic are $530.


  • NaturalMat- This is a phenomenal, artisan-made brand. The mattresses are made of coconut husk, latex, or mohair which are awesome options. They run about $400, which seemed too steep. In retrospect, we should've considered this option more seriously.


  • Naturepedic- The ultimate hybrid between coil mattress with waterproof cover and natural: organic materials, no PVC, no polyurethane, no chemical fire retardants, made in the USA, comes with a lifetime warranty. This mattress does contain some non-natural components (like the waterproof cover), but they've selected materials that do not concern me. The price is not cheap, but not exorbitant at $250-400. Even the most basic model seemed ample for our needs.

    We decided to go with Naturepedic because we could register for it at Buy Buy Baby and then use a 20% off coupon (they take both Buy Buy Baby and Bed Bath and Beyond coupons). We wanted a no-compromise mattress, but we also wanted a palatable price tag. Even factoring in the discount, this would be our highest ticket baby item. But we couldn't think of a better item to splurge on: babies spend about two-thirds of their time sleeping. Also, since most of V's gear was given to us used, purchased used, or is on loan, we could make this fit in the budget.

    We watched Craigslist for awhile to see if a used Naturepedic would come up for cheap (one of the sealed, wipe-clean kinds that would be totally healthy used), but no dice. In the end, we were very fortunate that my family chipped in and bought the mattress as a shower gift.


    What a great gift! Baby's mattress, complete with a blue bow.


    Newborn Baby V Sleeping on a Naturpedic Mattress

7.03.2011

Crib Part 1: Choosing an Eco-Friendly Crib

We have always planned on being a co-sleeping family during the nursing years, but figuring out how that would work logistically in our small bedroom took some time. Bed-sharing seemed like the most simple, logical option. After all, bed-sharing is a very safe, healthy way to sleep when done properly (info on how and why: here and here) and is the lowest-gear configuration. But, it wasn't a fit for us. I thought we'd be crowded in our queen-size bed and we don't have space for a king-size. So, we thought we'd borrow a full-size co-sleeper from a friend and keep that in our room for the long haul, plus have a crib and twin-size bed in baby's room just in case we needed to switch up our sleeping arrangements. As I realized how much effort I was putting into picking the healthiest crib and mattress, we eventually decided to ditch the co-sleeper plan and just sidecar baby's crib to our bed so he could get maximum usage out of the equipment we were putting so much thought and money into. Join me for a multi-part series on choosing a bed for baby: choosing a crib (this entry), choosing a crib mattress, and how to sidecar a crib to an adult bed.


Choosing a Crib


I knew that I wanted a crib that was made of solid wood rather than with pressed wood product like medium density fiberboard (MFD) or particle board. The glue used to hold together the bits of wood that makes up these composite materials contains formaldehyde (a probable human carcinogen) and they off-gas volatile organic compounds (VOCs) for several months. Many mass produced cribs are made with a blend of real wood parts (albeit often soft woods like pine) and composite parts (such as a drawer underneath) and off-gassing is a genuine issue with them.


Additionally, I wanted the wood to have either an eco-friendly finish or no finish. I was a crib gnawer as a baby, and I figured that our baby might also spend some time doing some soothing chomping on his crib rails (crib rail protectors exist, but are made of plastic which we avoid).


I consulted the ever-popular Baby Bargains book and got a list of green cribs and had sticker shock. I figured that as much we love cheap, simple living, this was one area that I was ok with splurging since a baby likely spends more time in a crib than any other single space, but wow. WOW!


  • Romina cribs are made of beech with a beeswax finish and range in price from $700 to $1,100

  • Pacific Rim makes unfinished wood cribs that are $1,000+

  • Stokke Sleepi is made of beech and is a lovely oval shape, but the round mattress and curved sheets make an expensive crib even pricier

  • Ducduc cribs are fabulously modern and run $1,000 to $2,000+

  • Capretti's green cribs Verde and Fino are $1,600-$1,900 and I am not sure that they are still in production

Thank goodness for the lone dirt cheap option: Ikea Sniglar. Sniglar* is a very basic crib made of solid, unfinished beech and is a mere $70. It does have a fiberboard base, but…well—I am just too cheap to pay a thousand bucks for a crib. This was in the realm of being a reasonable compromise. Especially because the Sniglar has some versatility: an adjustable-height mattress and one side can be removed to create a toddler bed (or, even better for us, a sidecar configuration on to an adult bed). Ikea has cuter cribs, but Sniglar is Ikea's only unfinished crib.


Before making a decision, I stalked Craigslist for used** versions of any of these cribs. Even though the Sniglar was cheap, a used one would be even cheaper and the base would probably be done off-gassing. Time went on and no Sniglar came up. A couple of the premium brand cribs came up but not for a price that was acceptable to us. So, we bought the Sniglar early enough that it could air out for a few months. When we went to pick it up, we were happy to see that it is a little more attractive in real life than the stock pictures make it out to be.


The Sniglar was fairly easy to put together, which was a good thing because I assembled it in the living room and it is wider than our bedroom doorways. Oops! Eventually we got it out of the living room and into the guest room (decorated to be baby V's room someday) where it aired out until we moved it in our room when he was born.


Sniglar airing out in the guest room/someday V's room


*There is a precautionary recall out on some Sniglar cribs. Ours was not impacted, but it looks like an extremely easy fix if you have one that is part of the recall.


**I am pro used cribs, but it is vital to make sure than any used crib meets current safety standards. Here are several resources: Crib Information Center (the latest information and a list of recalls), a summary of things to look for, and a long list on choosing a crib.

6.19.2011

Rain Barrel Installation Part 2


The University of Rhode Island lists some great benefits to rain barrels:


  • Rain barrels conserve water and help lower costs (a rain barrel can save approximately 1,300 gallons of water during peak summer months).


  • Rain barrels reduce water pollution by reducing stormwater runoff, which can contain pollutants like sediment, oil, grease, bacteria and nutrients.


  • Rain barrels can also be arranged to slowly release the collected rainfall to areas that can soak up the water, reducing stormwater runoff and increasing groundwater recharge.

Here is more on our rain barrel installation:


(See Rain Barrel Installation Part 1 here if you missed it.)


Installed!


We used cinder blocks (thank you Freecycle) to raise the rain barrel so the spout is high enough to fit a large watering can underneath (this factored into our measurements before we cut the downspout). I've been stalking Freecycle for trellising to put around the cinderblocks to hide them and make things look nicer.


Lesson Learned

Vertical cinderblocks are tippy. When our barrel got full and heavy, it went for a tumble (and even more of the paint is scraped off). We rearrange the blocks horizontally to be more stable.


Overflow Preparation
The rain barrel fills up surprisingly quickly when we have a storm, so a full-size overflow spout keeps things moving. Also, we already have water issues, so we wanted to make sure the overflow was getting routed to the sewer as efficiently as possible.


Mosquito-Free Zone

Because any standing water can become a mosquito breeding ground, we pop these plant-and-wildlife-safe mosquito dunks into the barrel a few times per season. Technically, closed mosquito barrels, like ours, are not at risk for becoming breeding grounds, but I'm happy to be extra cautious and add the dunks.


Final Thoughts
Rain barrels are very low-pressure, so it is helpful to have two watering cans--one can fill up while the other is being poured on the garden. It would be great it there was some way to connect a rain barrel to sprinkler hose and get that to actually work, but I just don't think the barrel affords that kind of water pressure.


Yes, it takes some effort to fill up the watering can(s) to water the plants, but it just takes a few more minutes than dragging around a hose, and it is a good way to get in a little exercise, saves money, and can keep your lawn or garden growing strong during water rationing.


Remember, rain barrel water is not potable. Thoroughly wash produce grown with it before eating. Do not use rain barrel water for washing hands or swimming.


Want to make your own?


Here you go.

Or, if you live in the Northern Virginia area, check this out. At workshops in July and October 2011 you can build your own rain barrel for $52 or buy one for a mere $62.

6.15.2011

Rain Barrel Installation Part 1

Our second year of Square Foot Gardening is off to a good start, as is our second year of watering the plants from a rain barrel. Commercial rain barrels are pricey, and I am not wild about buying new plastic items, so we started searching Craigslist for used rain barrels. When we found a listing for new rain barrels made from reclaimed 50-gallon food drums for a mere $35 each, we were sold! Well, we were sold enough to put them on our Christmas list as our number one wish (our families are big on wish lists).


We installed one rain barrel in the back of our house last year. Here’s how it went…

Painting It White
I used exterior primer and paint. It looked good for a couple of minutes before it got its first couple scratches. I should’ve put a clear coat on top. We might just go with the blue when we install the one in the front, especially now that we have a bright blue front door and are working on blue shutters.


Installation
After carefully measuring how high we want the rain barrel, hubby bravely hand-saws through our brand, spanking new downspout.


Time to connect the shortened downspout to the rain barrel.


In Part 2: lessons learned and more pictures.

5.23.2011

Vacancy: Cozy, Warm Bat House


Because one bat can eat anywhere from hundreds to one thousand small bugs in an hour, we wanted a bat house in hopes of attracting the critters to our yard to act as natural mosquito control. Our bat house is a single chamber bat house made in the USA by Wildlife’s Choice and was purchased from Wild Bird Center.


The Organization for Bat Conservation has great information on their site on how to select or build a bat house, optimal placement, and more. Following their guidance, we installed our bat house directly against the house on the sunniest side. The sun warms the bricks and box, which makes it a snugglier place for bats to hang out. 15-18 feet above the ground is the optimal height, but we had to factor in our house shape, how trees cast undesireable shadows on the box, and where the guano (bat poo) will fall (i.e. not directly above any windows we keep open).
It can take six months or more for bats to discover the house and take up residence. Though we are nearing six months, our house still seems to be empty. We check for inhabitants by seeing if any guano has collected on the ground under the bat house. Once we get some resident bats, we may plant ornamental grass under the bat house so the guano can fall into that and compost naturally, rather than building up on the playable part of the lawn.

5.04.2011

Make Your Own Kitchen Cleaner


Ingredients:
1 t washing soda
2 t borax
½ t shredded castile soap (Shredding tips here. I prepare several bars worth at once.)
2 cups hot water
Essential oils


Supplies:


16 oz spray bottle
Funnel
Skewer
Measuring cup
Measuring spoon (teaspoon)


Directions:
Add dry ingredients to bottle via funnel. Don’t worry about dry ingredients sticking in the funnel at this point. Add the water via the funnel to rinse the dry ingredients down into the bottle. If the mixture clumps and sticks in the funnel, use the skewer to break up the clog. Add the essential oils directly to the bottle, so none is wasted by sticking to the funnel. For the kitchen mix, I like 2 drops tea tree oil, 5-6 drops of sweet orange, and 2-3 of bergamot.

Shake before using. Spray and wipe with a dry cloth. For especially sticky spots, spray and wipe with a cloth saturated with clean, hot water.


Yes, it really works! I have been using this mixture for several years and it was part of The Big Clean when we bought our trashed foreclosure home.


(This recipe is based on the Castile Cleaner recipe found in the fabulous book Green Clean.)

4.30.2011

Greeting Card Mobile


I was inspired to make a greeting card mobile for baby V after seeing one on another blog. Rather than having the cards from my baby shower sit in a drawer gathering dust, or go into the recycle bin never to be seen again, the mobile allows us to appreciate the cards every day.
For my base, I cut off the top from an octagonal box that a flower vase came in. From there, I used copious amount of hot glue to affix the card cutouts to every surface of the box—inside and out.

The mobile is suspended with an arm that came with a commercial mobile that we happened to have one on hand but suspending it from a hook in the ceiling would’ve worked even better than the arm. Long hanging distance is the key to good movement. The sunshine-shaped parts spin well, but the others don’t have long enough strings. The mobile moves gently with drafts from an open window, fan, or vent. Sometimes I “wind it up” by twisting the ribbon that holds it to the arm.

It ended up taking several hours—much longer than I thought—but it turned out wonderfully.


Detail shots:


4.15.2011

Milk Carton Garden Markers

Don’t toss that empty milk carton in the recycle bin just yet! Armed with scissors, a hobby blade, and a Sharpie, it takes just a few minutes to create garden markers sturdy enough to weather through a whole growing season and beyond. For this year, I just cut off the printing from last year's carton garden markers and still had plenty of marker left.


Cutting away the flat surfaces from the curved ones


Sloppy cutting doesn't phase me, as only the very top part ends up sticking out of the soil. The whiter ones are from the section where the carton label is.

In the raised beds (with room for writing notes, if desired)


Depending on the plastic recycling guidelines in your area, your creations should still be just recyclable when you are done with your creations.

4.11.2011

And Some Pictures!

Picasa was being wonky, so I just got these pictures uploaded.
Here's our little guy:

Baby Boy Vaughn January 4, 2011
6lbs 12 oz, 19 inches long
Born occiput posterior at 40 weeks, 4 days after 63 hours of labor


( Check out his tiny, blue Kissaluv diaper!)


4.10.2011

It’s Been Awhile

Hi there. It’s been awhile! A year ago—to the day—I was fortunate get (and stay) pregnant thanks to a wonderful reproductive endocrinology team at Shady Grove Fertility. I had a pregnancy that knocked the stuffing out of me, hence not writing for so long, but baby boy Vaughn is here and he is a delightful three-month-old. Since Infertility Awareness Week is coming up soon (April 24-30), I want to share the link we shared with our support team as we started treatments. While every couple reacts uniquely to infertility—and hubby and I don’t align with 100% of the things in these articles—they are the best resource we found for helping family and friends navigate how to be supportive. I remember at one point during our journey, several of my favorite blogs went baby-crazy and I had to stop reading them. If you would prefer a baby-free version of this blog, you can access it here. I’ll be back with More Green for Less Green ideas soon. I’ve got a year’s worth of ideas stored up in my brain!

5.27.2010

Master Bedroom Reveal

I am so excited to reveal before-and-after pictures of our master bedroom with you! The room is just under 10 by 13 feet, so it is hardly a "master" bedroom by today's standards. But, we have worked hard to make it a cozy oasis.

First, some before pictures...

This picture is blurry, but if you look closely you can see some faint graffiti on the wall (a heart is the most noticeable bit). Our best guess is that it was done with white spray paint, but who knows. That heart bled through layers of primer-sealer! You also can see general damage to the wall. You can click on the picture to open a larger view.


Here is general filth on another wall-- in addition to the mystery filth stains, there actually is stuff dripping down the walls! The floors are very scuffed and water-stained. You can click on the picture to open a larger view.


Making progress...primed walls plus refinished floors. We switched primer brands midway and the trim is not painted, so the walls still look weird, but they are on the right track.


And now
.
.
.
.
.
how it looks today!

The paint color is a blend that I made myself after buying a too-dark color. That will have to be a blog entry unto itself! We still need to get the rest of our wall-hangings up and we will probably install a ceiling fan at some point.


I love having a TV for movies only, we don't have TV services to the house so everything we watch is deliberate. When I have TV, I tend to just get sucked in and watch to watch.

Having the aquarium in the room was a debate, as the little table is not my optimal style and narrow though it is, it take up space in a small room. But, I love watching our aquatic frog swim around--living art!


Behind the entry door to the room is the door to the tiny closet. Because I rarely have to wear ironed/dressy clothes, I need little easily-accessible closet space. So, I use this closet and hubby used the larger closet in our shared office, one door down. I use a closet in the basement for fancy dresses and off-season clothes.

5.24.2010

Foaming Hand Soap

Making foaming hand soap is super-easy and saves money by lessening concentrated soap usage. While you can certainly buy a foaming soap dispenser from Bed Bath and Beyond, Target, or online, I've chosen to reuse empty disposable foaming soap dispensers gathered from others. I figure, why pay for something new when I can get life out of something that would otherwise go in the trash or recycle bin? From Freecycle I've received empty Dial Complete and Bath and Body Works foaming soap dispensers. The Dial ones work great; I haven't tried the Bath and Body Works ones yet.

The recipe is simple: 1 part soap to 9 parts water. I just estimate 1/10 of the volume the bottle will hold. More soap to water is fine, so don't nitpick over the amount. Personally, I use Dr. Bronner's Unscented Baby Mild Liquid Castile Soap which is vegan, fair trade, organic, and friendly to the water supply.


Squirt in the soap then fill the rest of the bottle with water, leaving enough space for the bulky pump to fit in. Voila!

Sometimes I scent each batch of soap using essential oils (start with 10 drops, but you may need even double or triple that you get the level of scent you want), but usually I just leave it unscented.

Related Posts with Thumbnails